- دکمه ی هاوردار
- معرفی Hover.css
- دکمه ی درخشان
- دکمه ی کششی
- دکمه ی توضیحی
- دکمه ی آیکون دار
- دکمه ی شبکههای اجتماعی
- دکمه ی تبلیغاتی
- دکمه ی سه بعدی
- دکمه ی گرادیانت دار
- دکمه ی حذف
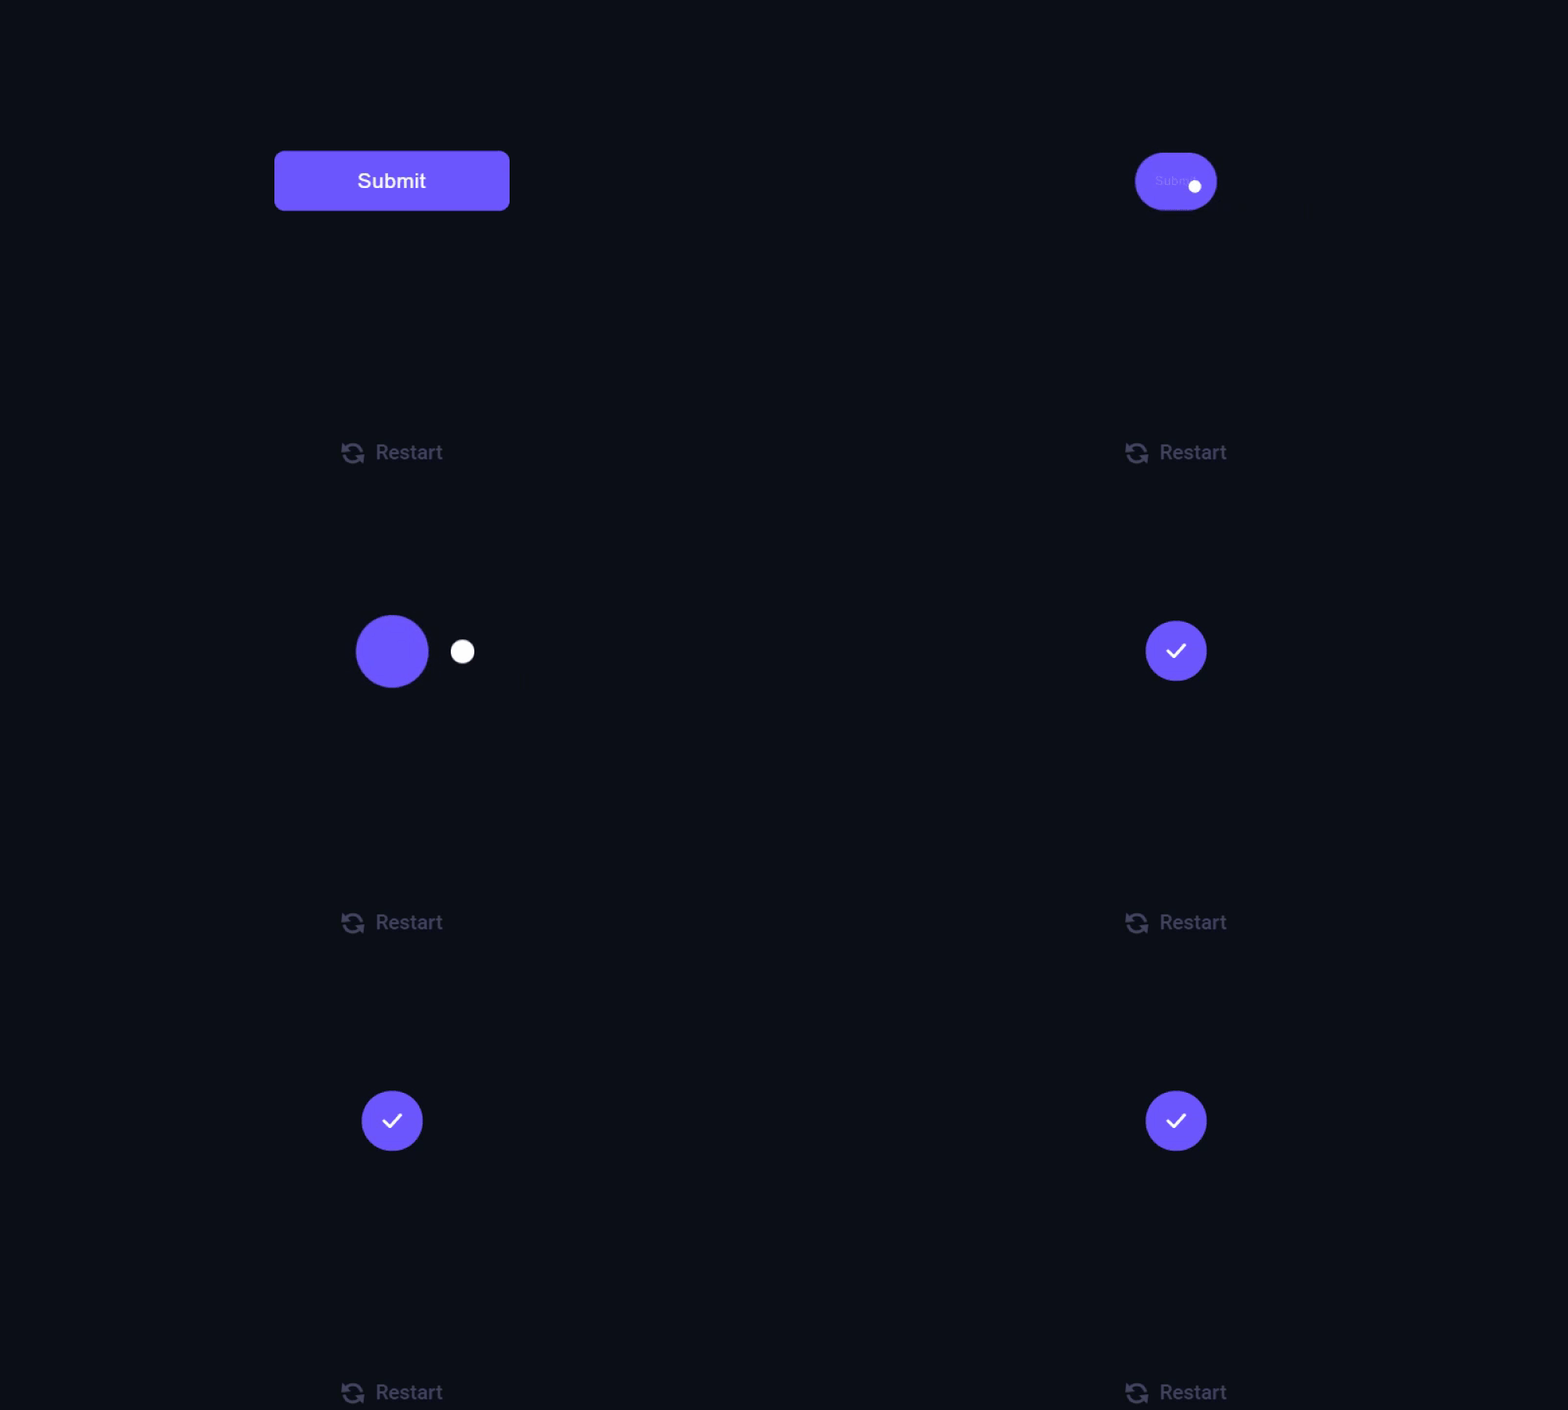
- دکمه ی ارسال
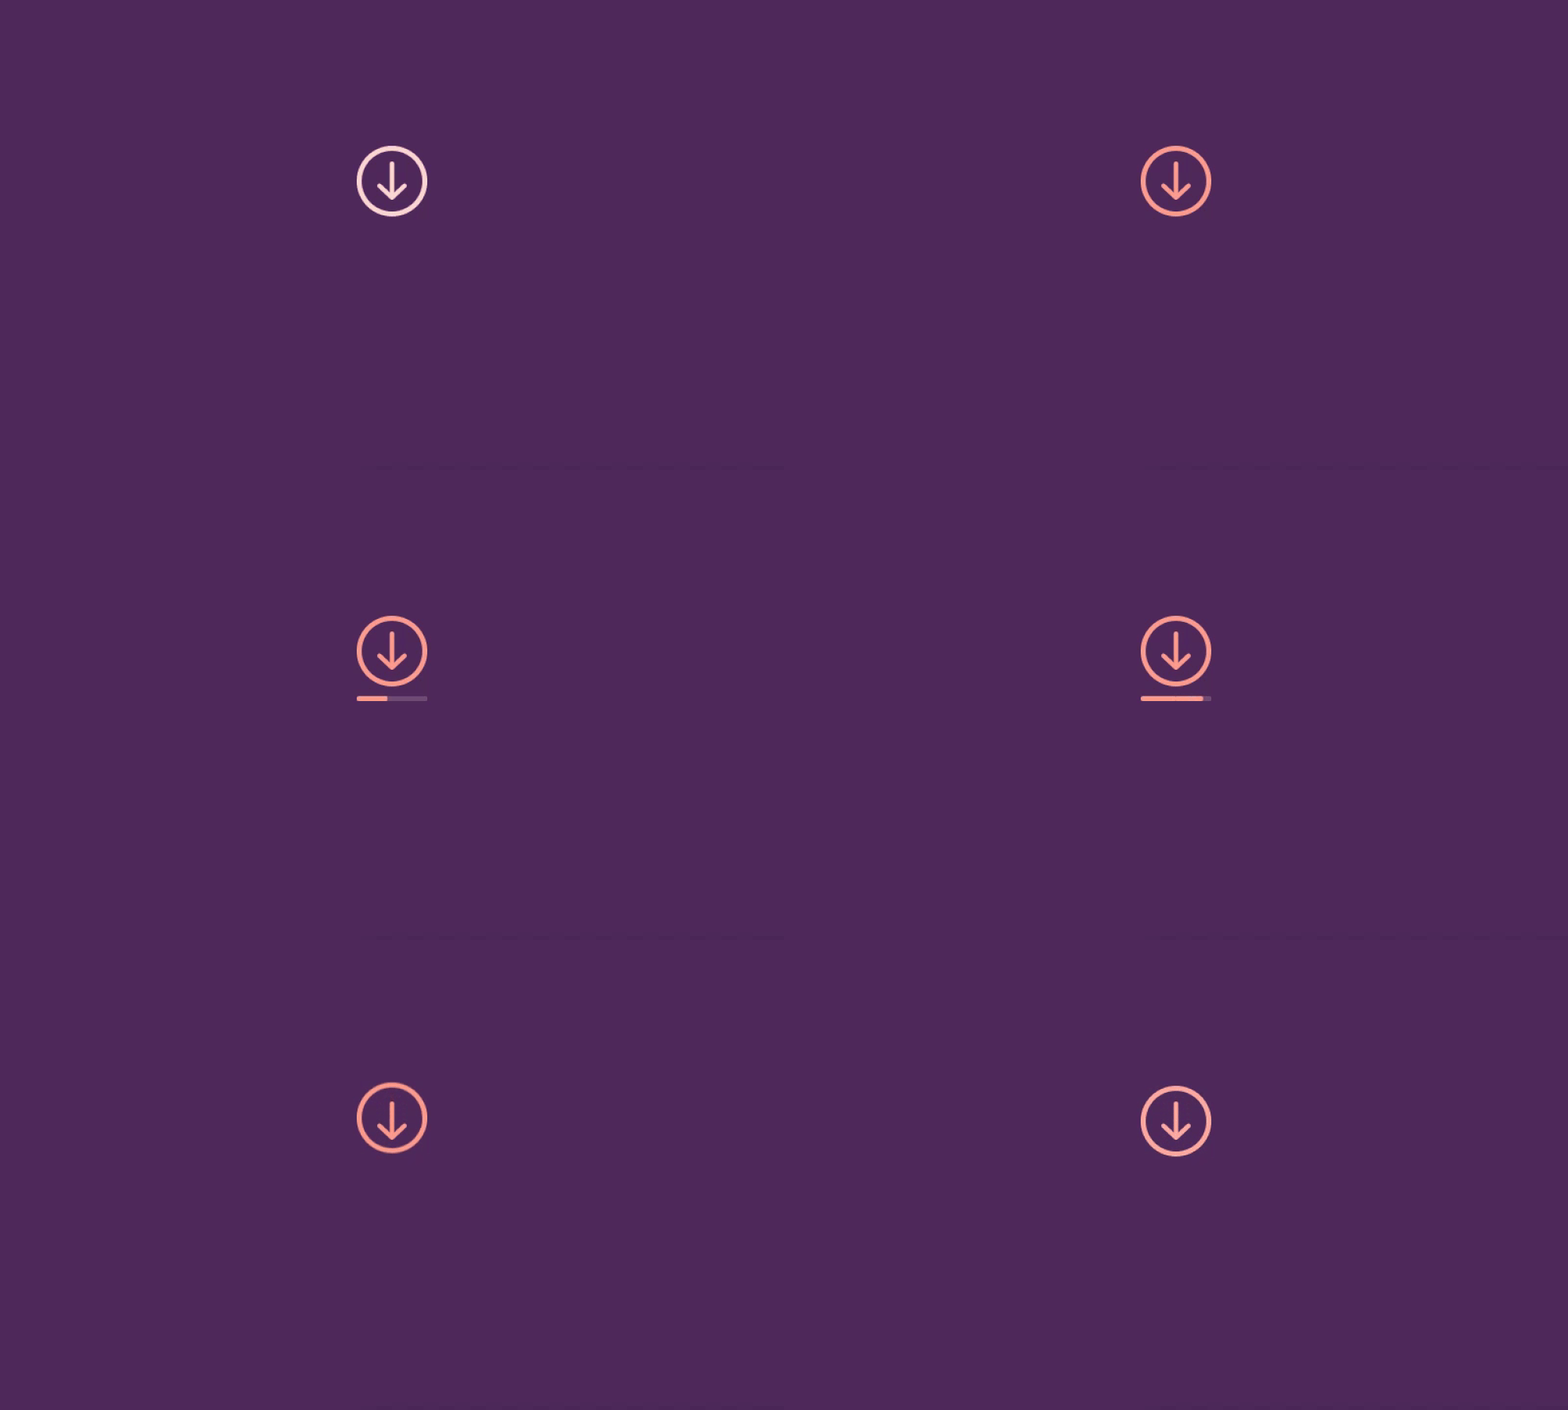
- دکمه ی دانلود
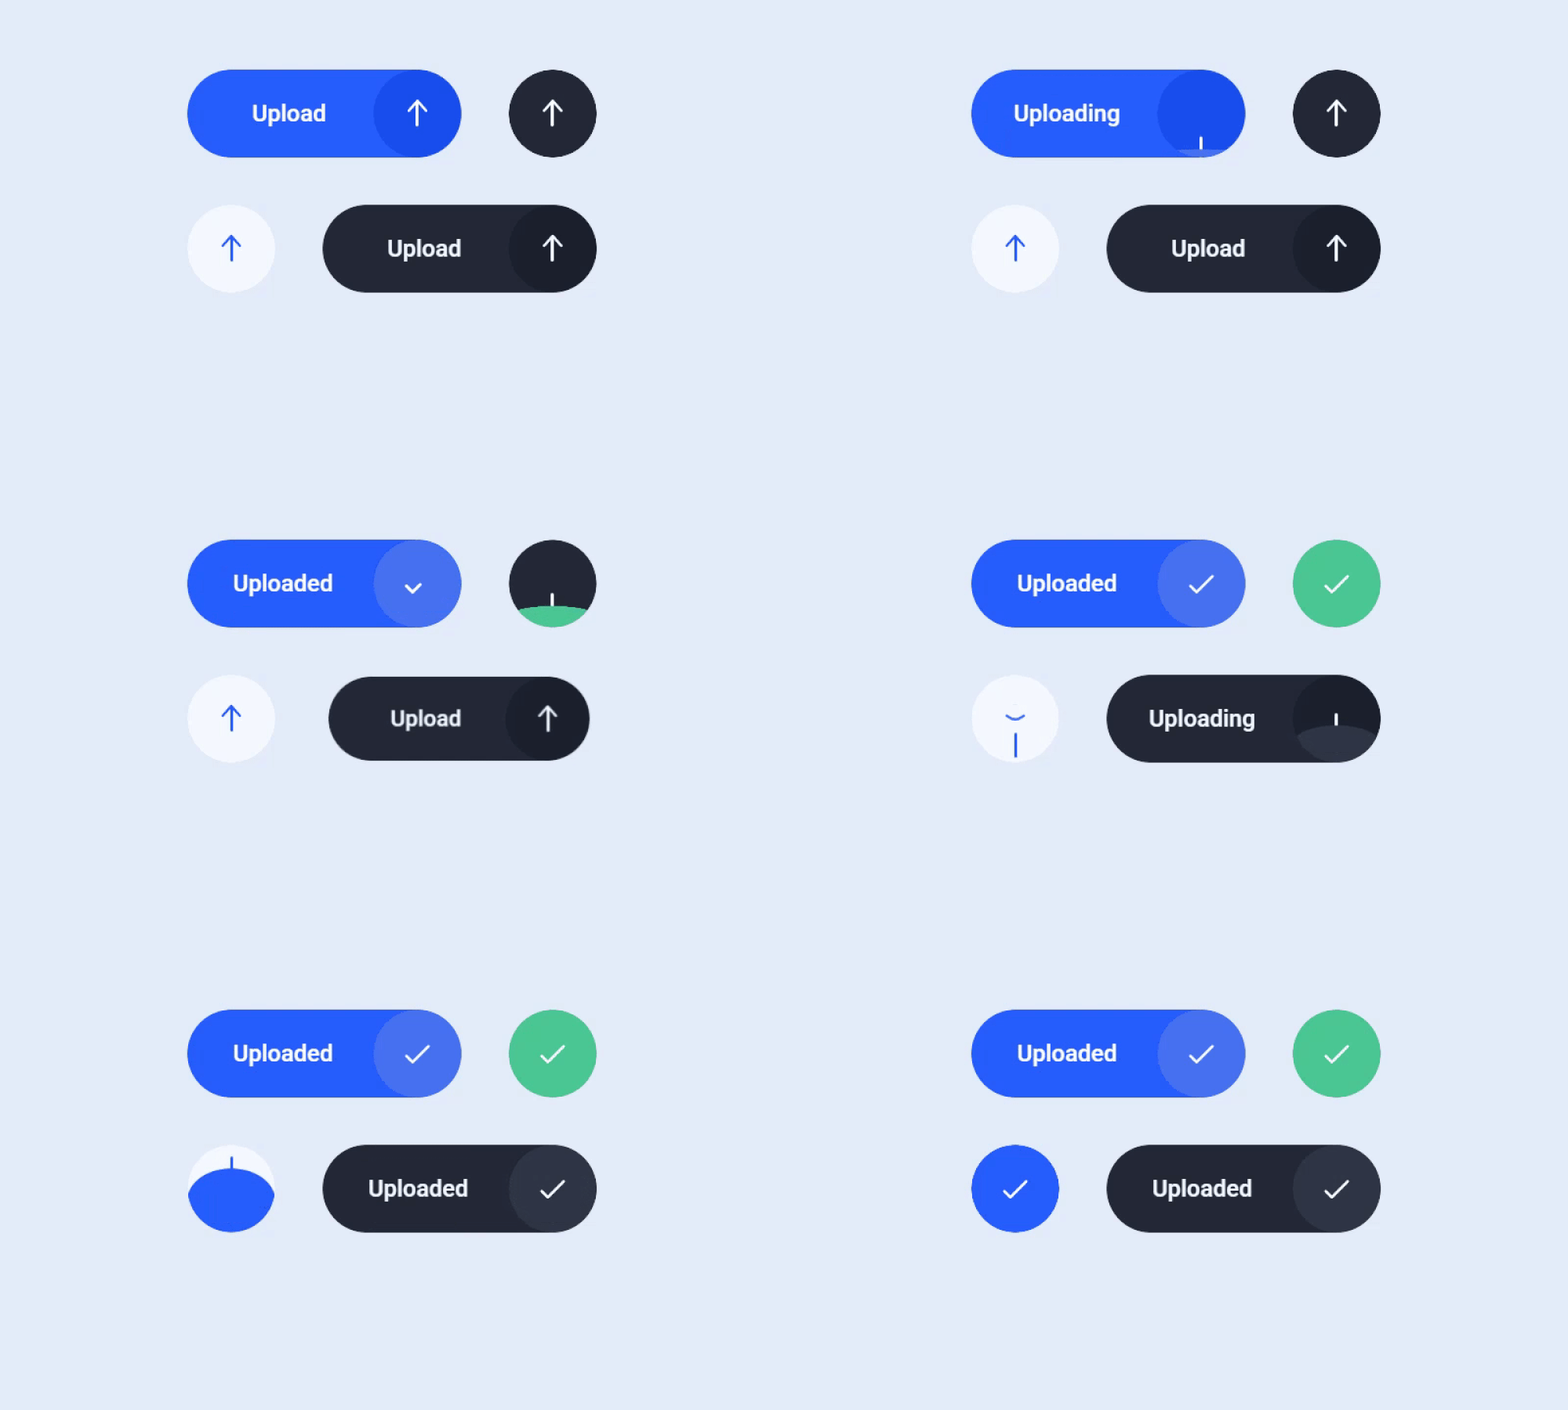
- دکمه ی آپلود
- دکمه ی تایید
هرچند ممکن است تصور کنید که کاربرد دکمهها در رابط کاربری بسیار ساده باشد، اما دکمهها از المانهای اصلی و مهم طراحی رابط کاربری هستند. به همین دلیل تصمیم گرفته ایم که در مقاله آموزش ساخت دکمه با HTML ، به سراغ طراحی آنها رفته و مواردی را که موجب ایجاد دکمههای زیبا میشوند و تجربه ی کاربر را بهبود میبخشند، پوشش دهیم. این کدها با CSS نوشته میشوند؛ اگر آشنایی کافی با CSS ندارید مقاله ی CSS چیست را حتما مطالعه کنید و برای آشنایی بیشتر با جاوا اسکریپت مقاله ی جاوا اسکریپت چیست را بخوانید.
دکمه ی هاوردار
کلاس هایی در CSS با نام pseudo-classes وجود دارند که برای تعریف حالت یک المان در شرایط خاص به کار میروند. هاور (hover) یکی از کلاسهای pseudo-classes است که برای انتخاب ظاهر یک المان، هنگامی که نشانگر موس یا هر وسیله ی دیگری روی آن قرار میگیرد، استفاده میشود. هاور میتواند برای لینک ها، تصاویر و ... تعریف شود که یکی از مهمترین این المانها دکمه است. باید توجه داشت که استفاده از هاور برای دستگاههای لمسی (که فاقد نشانگر هستند) دارای مشکلاتی است و توصیه نمیشود.
تقریبا اغلب طراحیهای جذاب برای دکمه با کد زدن با استفاده از هاور انجام میشود. قبل از طراحی هاورهای جذاب و کاربردی دکمه، ابتدا خود دکمه را تعریف کرده و کدهای مشترک در طراحی هاور را مرور میکنیم. ابتدا در بخش Html یک دکمه در صفحه میگذاریم:
<html>
<body>
<div id="container">
	<a href="https://7learn.com/" class="btn btn-hover">7learn</a>
</div>
</body>
</html>
همان طور که در بالا میبینید، دکمه ی ما سون لرن نام داشته و با کلیک روی آن، به صفحه ی اصلی سون لرن میرویم. همچنین دو کلاس به این دکمه اختصاص داده شده: btn و btn-hover . کلاس اول یا btn استایل عادی دکمه در حالتی که نشانگر روی آن قرار نگرفته را تعریف کرده و کلاس دوم یا btn-hover استایل دکمه را وقتی موس روی آن قرار میگیرد مشخص میکند و کدهای مربوط به هاور را در این کلاس باید اضافه کنیم. در صورت عدم تعریف کلاس btn-hover دکمه ی ما دیگر قابلیت تغییر ظاهر را از دست میدهد و همواره به شکل کلاس btn دیده میشود. برای تمرین میتوانید btn-hover را حذف کرده و نتیجه را مشاهده کنید.
در بخش استایل، ابتدا ویژگیهای مشترک صفحه را تعریف میکنیم:
<style>
* {
  box-sizing: inherit;
  -webkit-transition-property: all;
  transition-property: all;
  -webkit-transition-duration: .6s;
          transition-duration: .6s;
  -webkit-transition-timing-function: ease;
          transition-timing-function: ease;
  margin: 0;
  padding: 0;
}
html,
body {
  box-sizing: border-box;
  height: 100%;
  width: 100%;
}
body {
  background: MediumSeaGreen;
  font-family: 'Roboto', sans-serif;
  font-weight: 400;
}
#container {
	width: 500px;
	margin: 50px auto 0;
	text-align: center;
}
</style>
گفتیم که استایل دکمه ی ما در حالت عادی با کلاس btn تعریف میشود:
<style>
.btn {
  color: #fff;
  cursor: pointer;
  display: block;
  font-size: 16px;
  font-weight: 400;
  line-height: 45px;
  margin: 0 auto 2em;
  max-width: 160px;
  position: relative;
  text-decoration: none;
  text-transform: uppercase;
  vertical-align: middle;
  width: 100%;
  text-align: center;
}
.btn:hover {
  text-decoration: none;
}
</style>
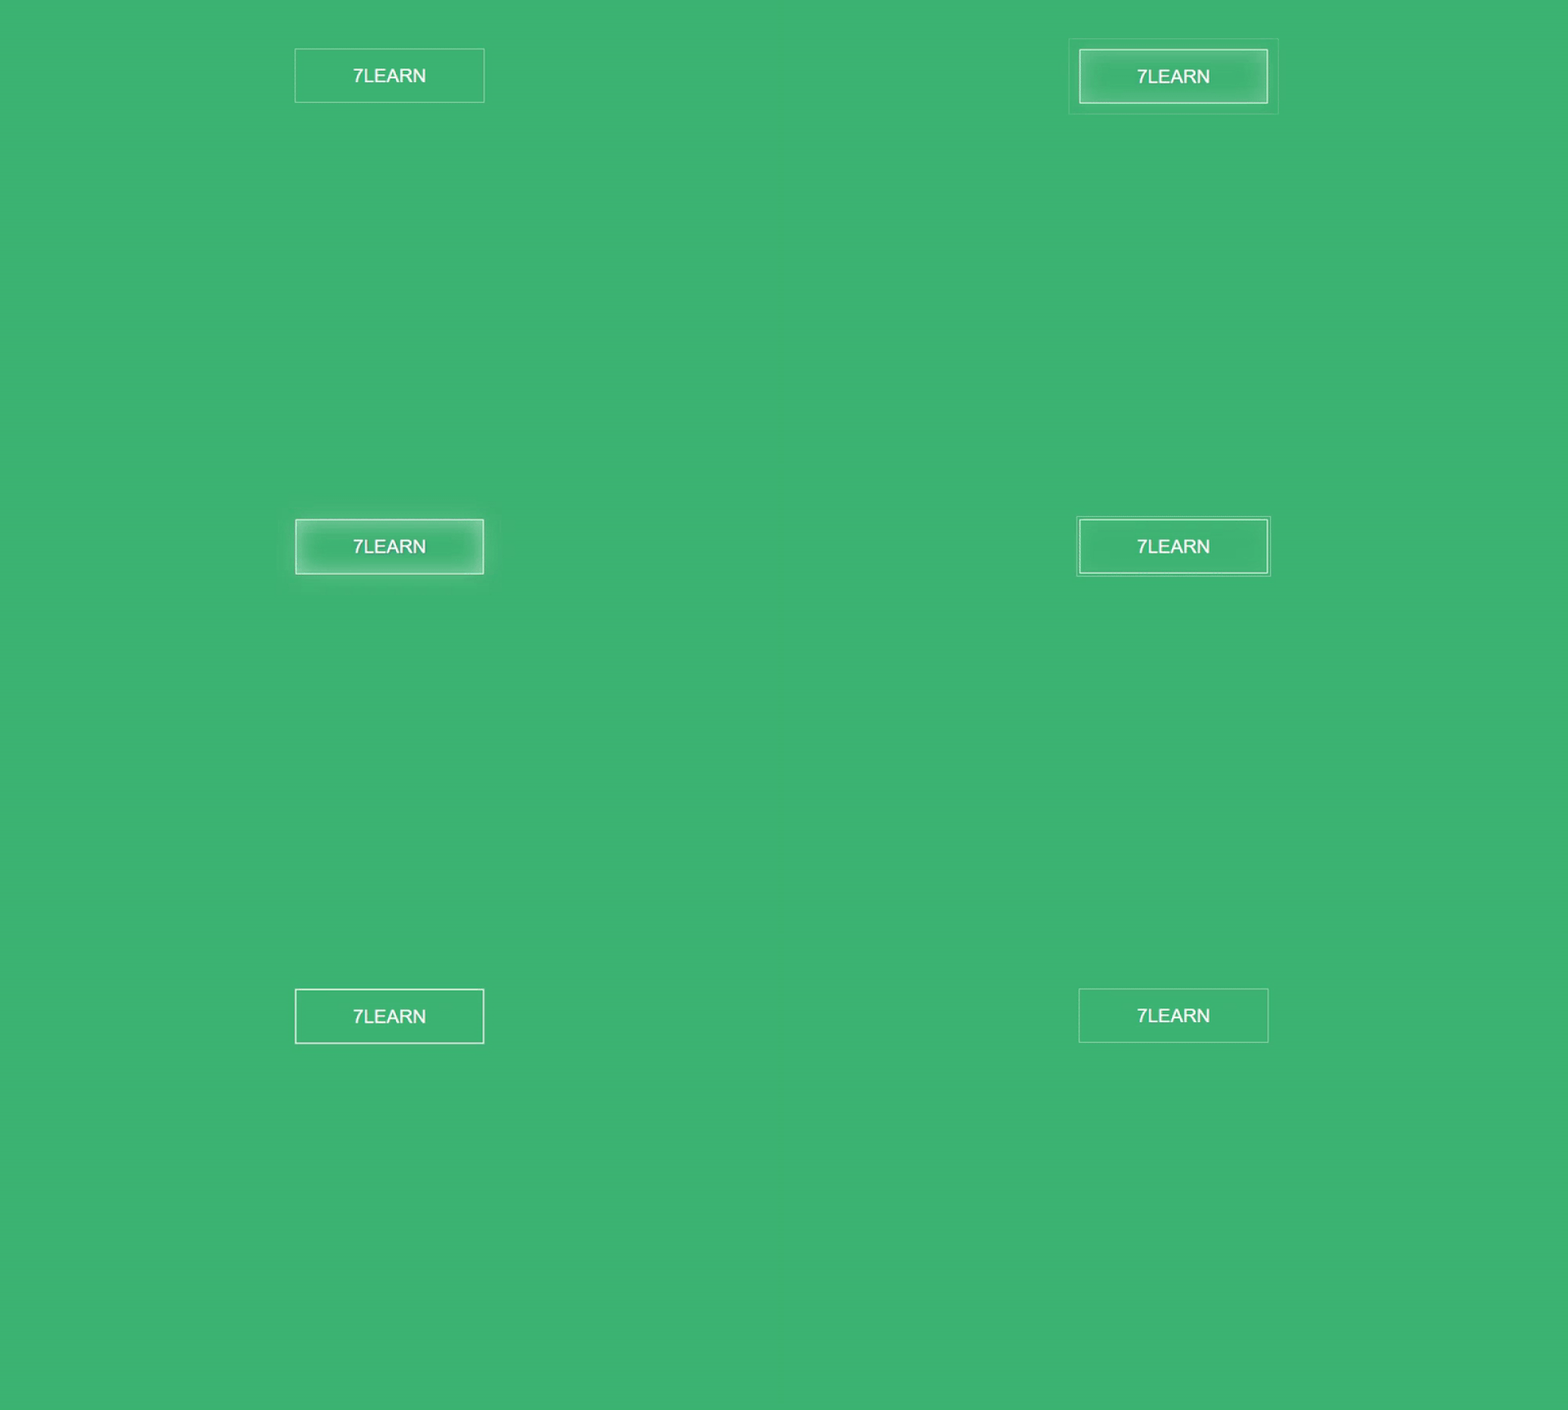
تنها بخشی که برای هاورهای مختلف تغییر میکند، تعریف کلاس btn-hover در استایل است که برای هر افکت متفاوت است. مثلا اگر بخواهیم هنگامی که نشانگر روی دکمه رفت، حاشیه ی دکمه روشن شده و مثل موج به بیرون پخش شود، باید کد زیر را برای کلاس تعریف کنیم:
.btn-hover {
  border: 0 solid;
  box-shadow: inset 0 0 20px rgba(255, 255, 255, 0);
  outline: 1px solid;
  outline-color: rgba(255, 255, 255, 0.5);
  outline-offset: 0px;
  text-shadow: none;
  -webkit-transition: all 1250ms cubic-bezier(0.19, 1, 0.22, 1);
  transition: all 1250ms cubic-bezier(0.19, 1, 0.22, 1);
}
.btn-hover:hover {
  border: 1px solid;
  box-shadow: inset 0 0 20px rgba(255, 255, 255, 0.5), 0 0 20px rgba(255, 255, 255, 0.2);
  outline-color: rgba(255, 255, 255, 0);
  outline-offset: 15px;
  text-shadow: 1px 1px 2px #427388;
} 
معرفی Hover.css
Hover.css یک منبع عالی و مجموعه ای از افکتهای زیبا برای انواع هاورها است و با استفاده از آن میتوان به راحتی سایت را زیباتر کرد. این مجموعه شامل افکتهای زیر هست:
2D Transitions
- Background Transitions
- Icons
- Border Transitions
- Shadow and Glow Transitions
- Speech Bubbles
- Curls
روند کار با این مجموعه همانند قبل است. استایل صفحه و دکمه در حالت عادی را تعریف میکنیم و سپس به Hover.css رفته و فایلهای موردنیاز را مطابق با راهنمای خود سایت، دانلود میکنیم. بعد از مشاهده ی مجموعه ی افکتها و انتخاب افکت موردنظر، باید آن را به استایل اضافه کنیم. برای این کار میتوان به دو طریق عمل کرد.
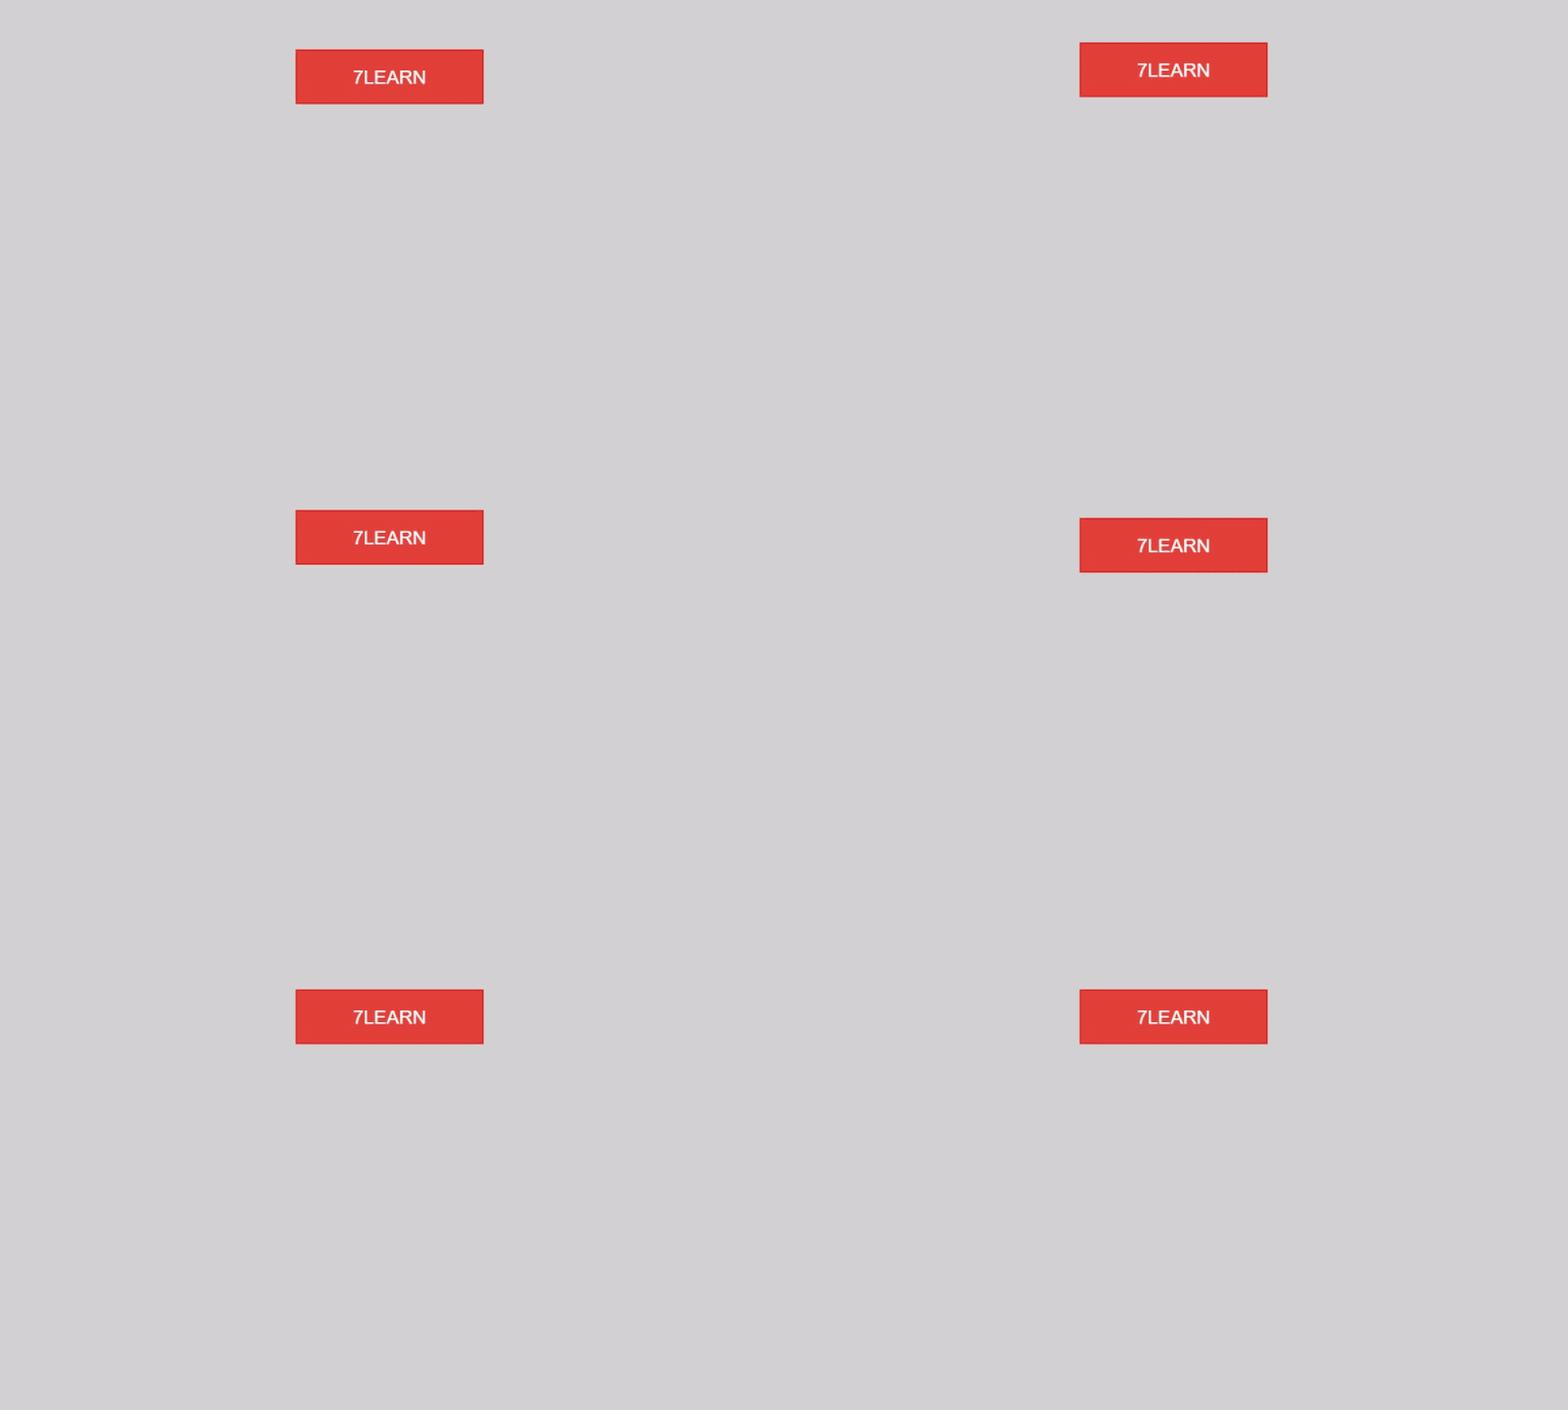
راه اول کپی کردن استایل در کلاس btn-hover مشابه مثالهای قبلی است. در این روش فقط قسمت استایل هاور را در کدهای سورس دانلود شده از این سایت پیدا کرده و به جای btn-hover میگذاریم. برای مثال برای افکت شناورشدن به بالا داریم:
.btn-hover {
background: #e3403a;
  border: 1px solid #da251f;
  display: inline-block;
  vertical-align: middle;
  transform: translateZ(0);
  box-shadow: 0 0 1px rgba(0, 0, 0, 0);
  backface-visibility: hidden;
  -moz-osx-font-smoothing: grayscale;
  transition-duration: 0.3s;
  transition-property: transform;
  transition-timing-function: ease-out;
}
.btn-hover:hover,
.btn-hover:focus,
.btn-hover:active {
  transform: translateY(-8px);
}
توجه داشته باشید که کدهای استایل مربوط به هر هاور در فایل hover-min.css است و هر افکت با hvr- شروع میشود. این روش باعث کمترشدن حجم داده و سبک ترشدن سایت میشود.
روش دوم، پیوست کردن فایل استایل به طور کامل در پروژه است که نسبت به روش قبلی برای سایت سنگینتر است:
<head>
	<link rel="stylesheet" type="text/css" href="hover-min.css">
</head>
با این کار میتوان از کلاسهای استایل تعریف شده برای هاور به طور مستقیم استفاده کرد. فقط این بار در بخش Html دکمه به جای btn-hover دقیقا باید نام کلاس تعریف شده در این مجموعه را بنویسیم. مانند:hvr-grow
دکمه ی درخشان
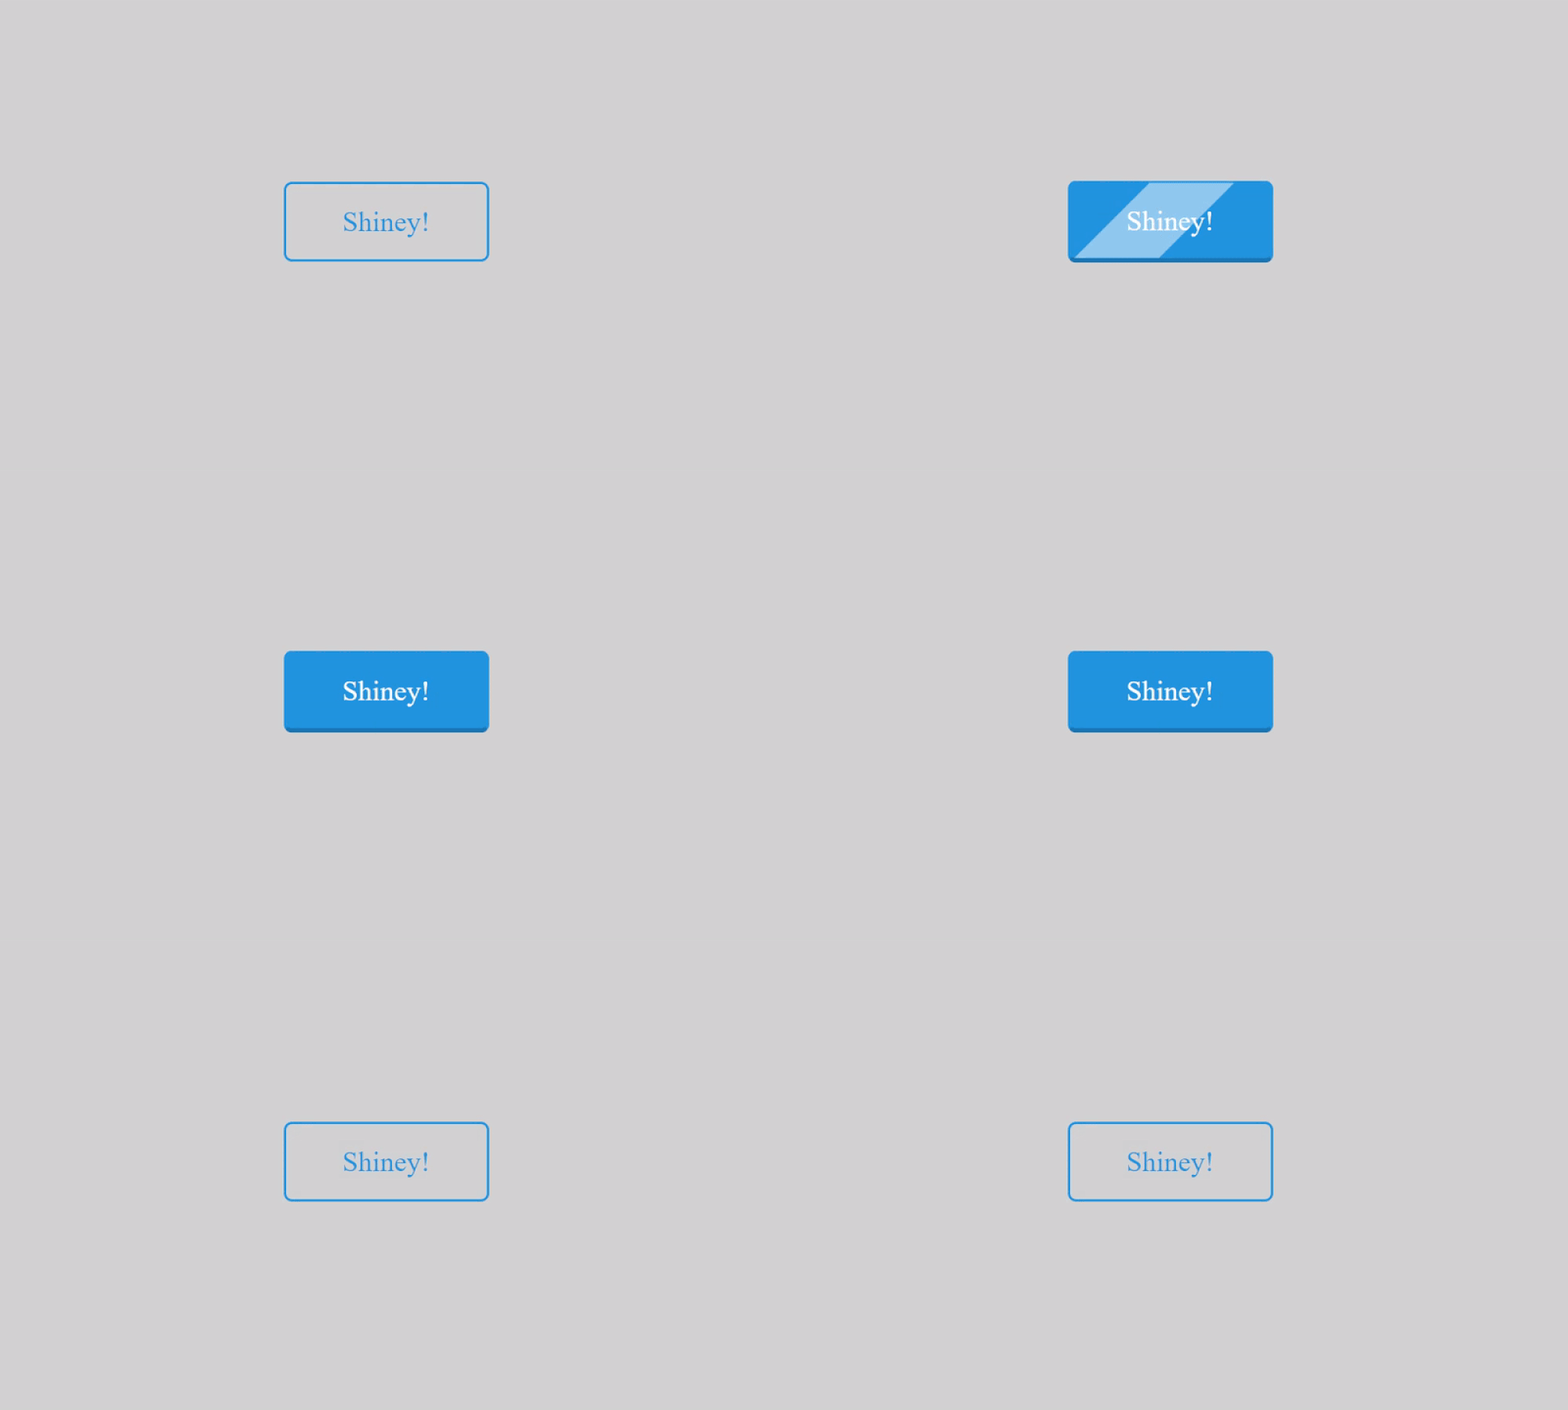
در این بخش از مقاله به آموزش ساخت دکمه درخشان با CSS میپردازیم.
یکی از سادهترین و پرکاربردترین دکمه ها، دکمه ی درخشان است. در بخش Html ابتدا دکمه را تعریف میکنیم:
<div class="wrapper">
  <a href="#" class="button">Shiney!</a>
</div>
سپس در CSS و با کمک هاور و تعریف حالت قبلی، کلاسهای افکت را کامل میکنیم:
body{
   background: LightGray;
}
@-webkit-keyframes sheen {
  0% {
    -webkit-transform: skewY(-45deg) translateX(0);
            transform: skewY(-45deg) translateX(0);
  }
  100% {
    -webkit-transform: skewY(-45deg) translateX(12.5em);
            transform: skewY(-45deg) translateX(12.5em);
  }
}
@keyframes sheen {
  0% {
    -webkit-transform: skewY(-45deg) translateX(0);
            transform: skewY(-45deg) translateX(0);
  }
  100% {
    -webkit-transform: skewY(-45deg) translateX(12.5em);
            transform: skewY(-45deg) translateX(12.5em);
  }
}
.wrapper {
  display: block;
  position: absolute;
  top: 50%;
  left: 50%;
  -webkit-transform: translate(-50%, -50%);
          transform: translate(-50%, -50%);
}
.button {
  padding: 0.75em 2em;
  text-align: center;
  text-decoration: none;
  color: #2194E0;
  border: 2px solid #2194E0;
  font-size: 24px;
  display: inline-block;
  border-radius: 0.3em;
  -webkit-transition: all 0.2s ease-in-out;
  transition: all 0.2s ease-in-out;
  position: relative;
  overflow: hidden;
}
.button:before {
  content: "";
  background-color: rgba(255, 255, 255, 0.5);
  height: 100%;
  width: 3em;
  display: block;
  position: absolute;
  top: 0;
  left: -4.5em;
  -webkit-transform: skewX(-45deg) translateX(0);
          transform: skewX(-45deg) translateX(0);
  -webkit-transition: none;
  transition: none;
}
.button:hover {
  background-color: #2194E0;
  color: #fff;
  border-bottom: 4px solid #1977b5;
}
.button:hover:before {
  -webkit-transform: skewX(-45deg) translateX(13.5em);
          transform: skewX(-45deg) translateX(13.5em);
  -webkit-transition: all 0.5s ease-in-out;
  transition: all 0.5s ease-in-out;
}
دکمه ی کششی
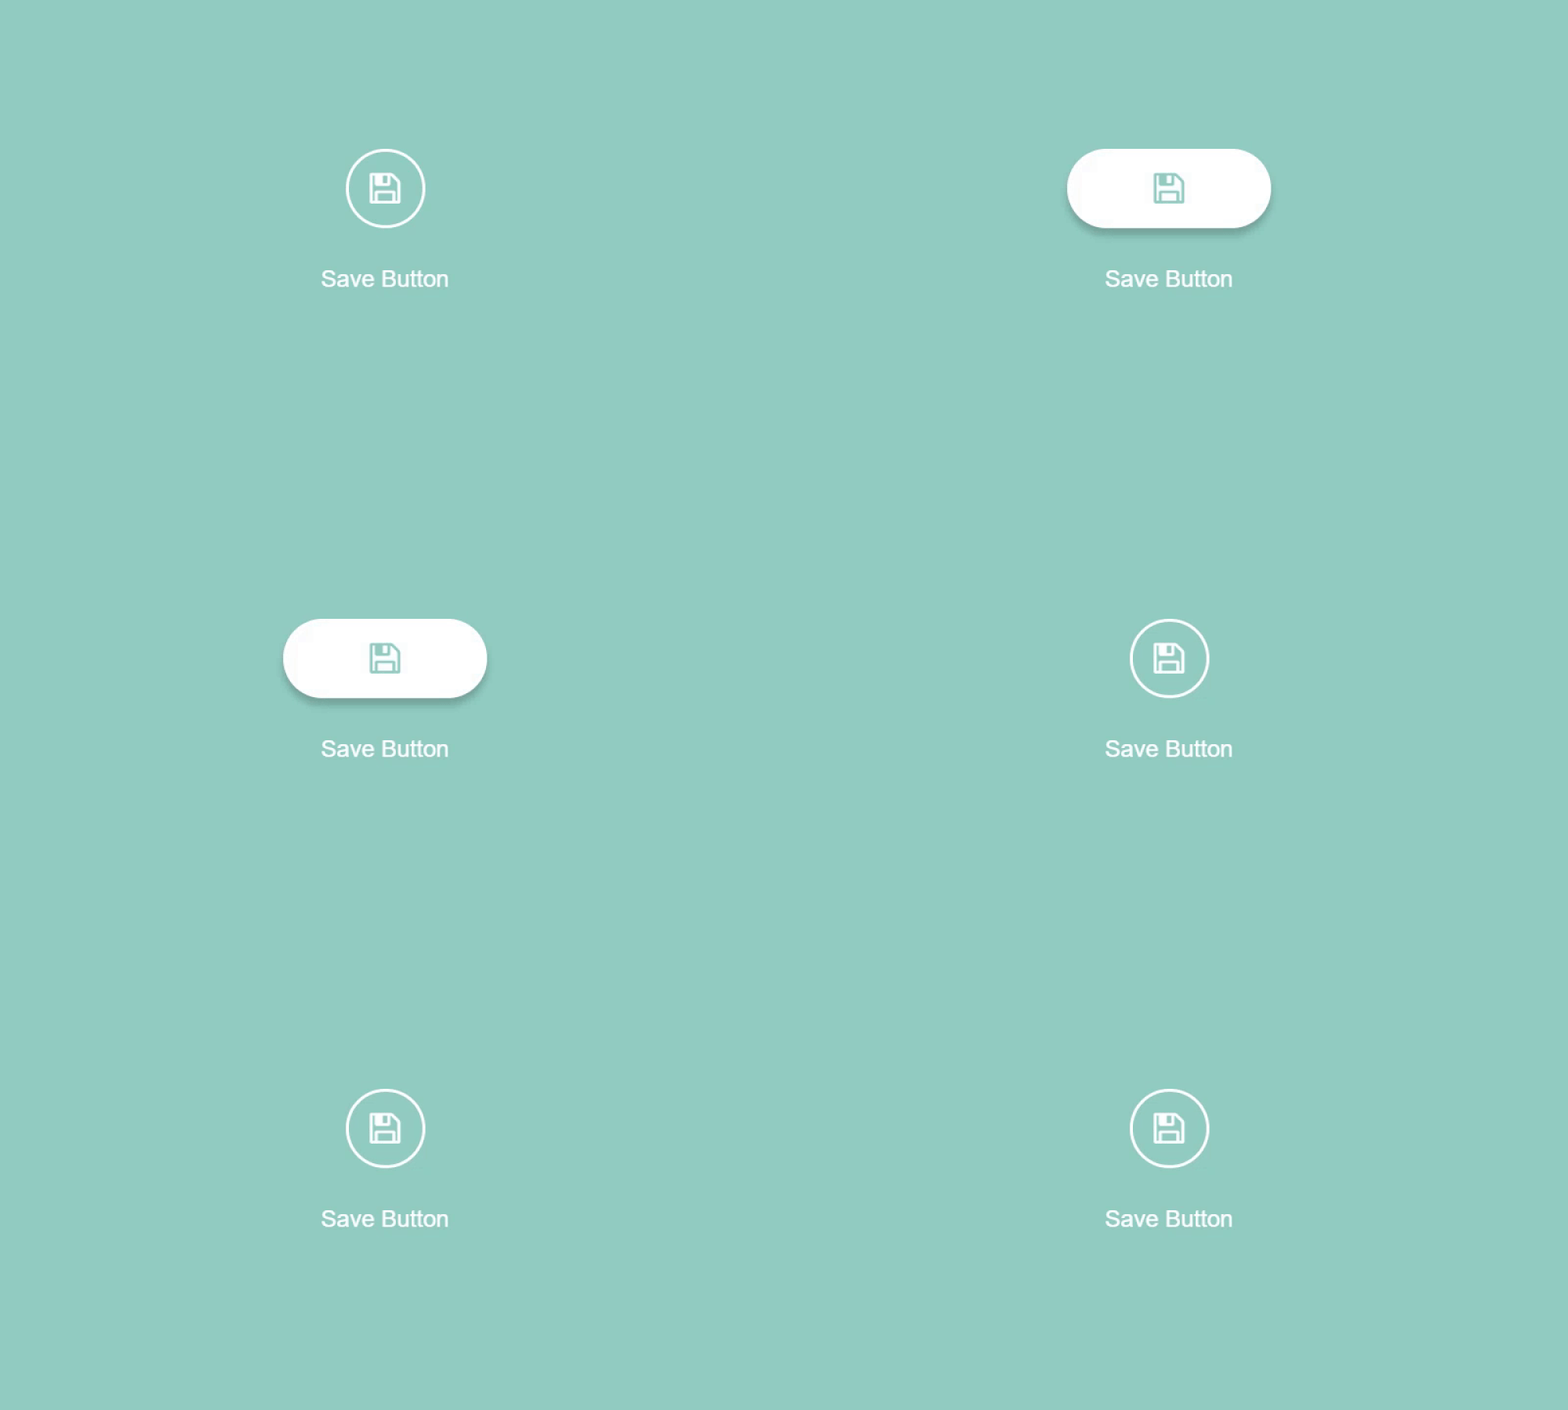
در این بخش از مقاله به آموزش ساخت دکمه کششی با CSS میپردازیم.
حتما دکمه ای را دیده اید که هنگامی که نشانگر موس را روی آن میبرید، کش میآید و scale میشود. برای نمونه یک دکمه ی ذخیره را مثال زدیم. ابتدا دکمه را در Html تعریف میکنیم:
<div class="container">
  <div class="button">
    <div class="icon">
      <i class="fa fa-floppy-o"></i>
    </div>
  </div>
</div>
سپس در بخش CSS با تعریف کلاسهای مرتبط با استایل و هاور، افکت کش آمدن را تعریف میکنیم. برای مشاهده ی افکتهای بیشتر میتوان به سایت Hover.css مراجعه کنید که در بخش قبلی درموردش توضیح دادیم.
$blue : #91CCC2;
body{
  background-color:$blue;
}
.container{
  width:250px;
  height:100px;
  margin: 20% auto;
  color:white;
  font-size:1rem;
  font-family:Arial,Helvetica Neue,Helvetica,sans-serif;
  }
p{
  text-align:center;
}
.button{
  font-size:1.5rem;
  border:2px solid white;
  border-radius:100px;
  width:40px;
  height:40px;
  padding:5px;
  margin: 10% auto;
  transition: .5s cubic-bezier(0.68, -0.55, 0.265, 1.55);
}
.icon{
 position: relative;
  top: 50%;
  transform: translateY(-50%);
 text-align:center;
}
//Hover
//-----------------------
.button:hover{
  width:125px;
  background-color: white;
   box-shadow: 0px 5px 5px rgba(0,0,0,0.2);
  color: $blue;
  transition:.3s;
}
.button:active{
  box-shadow: 0px 2px 5px rgba(0,0,0,0.2);
  transition: .05s
}
دکمه ی توضیحی
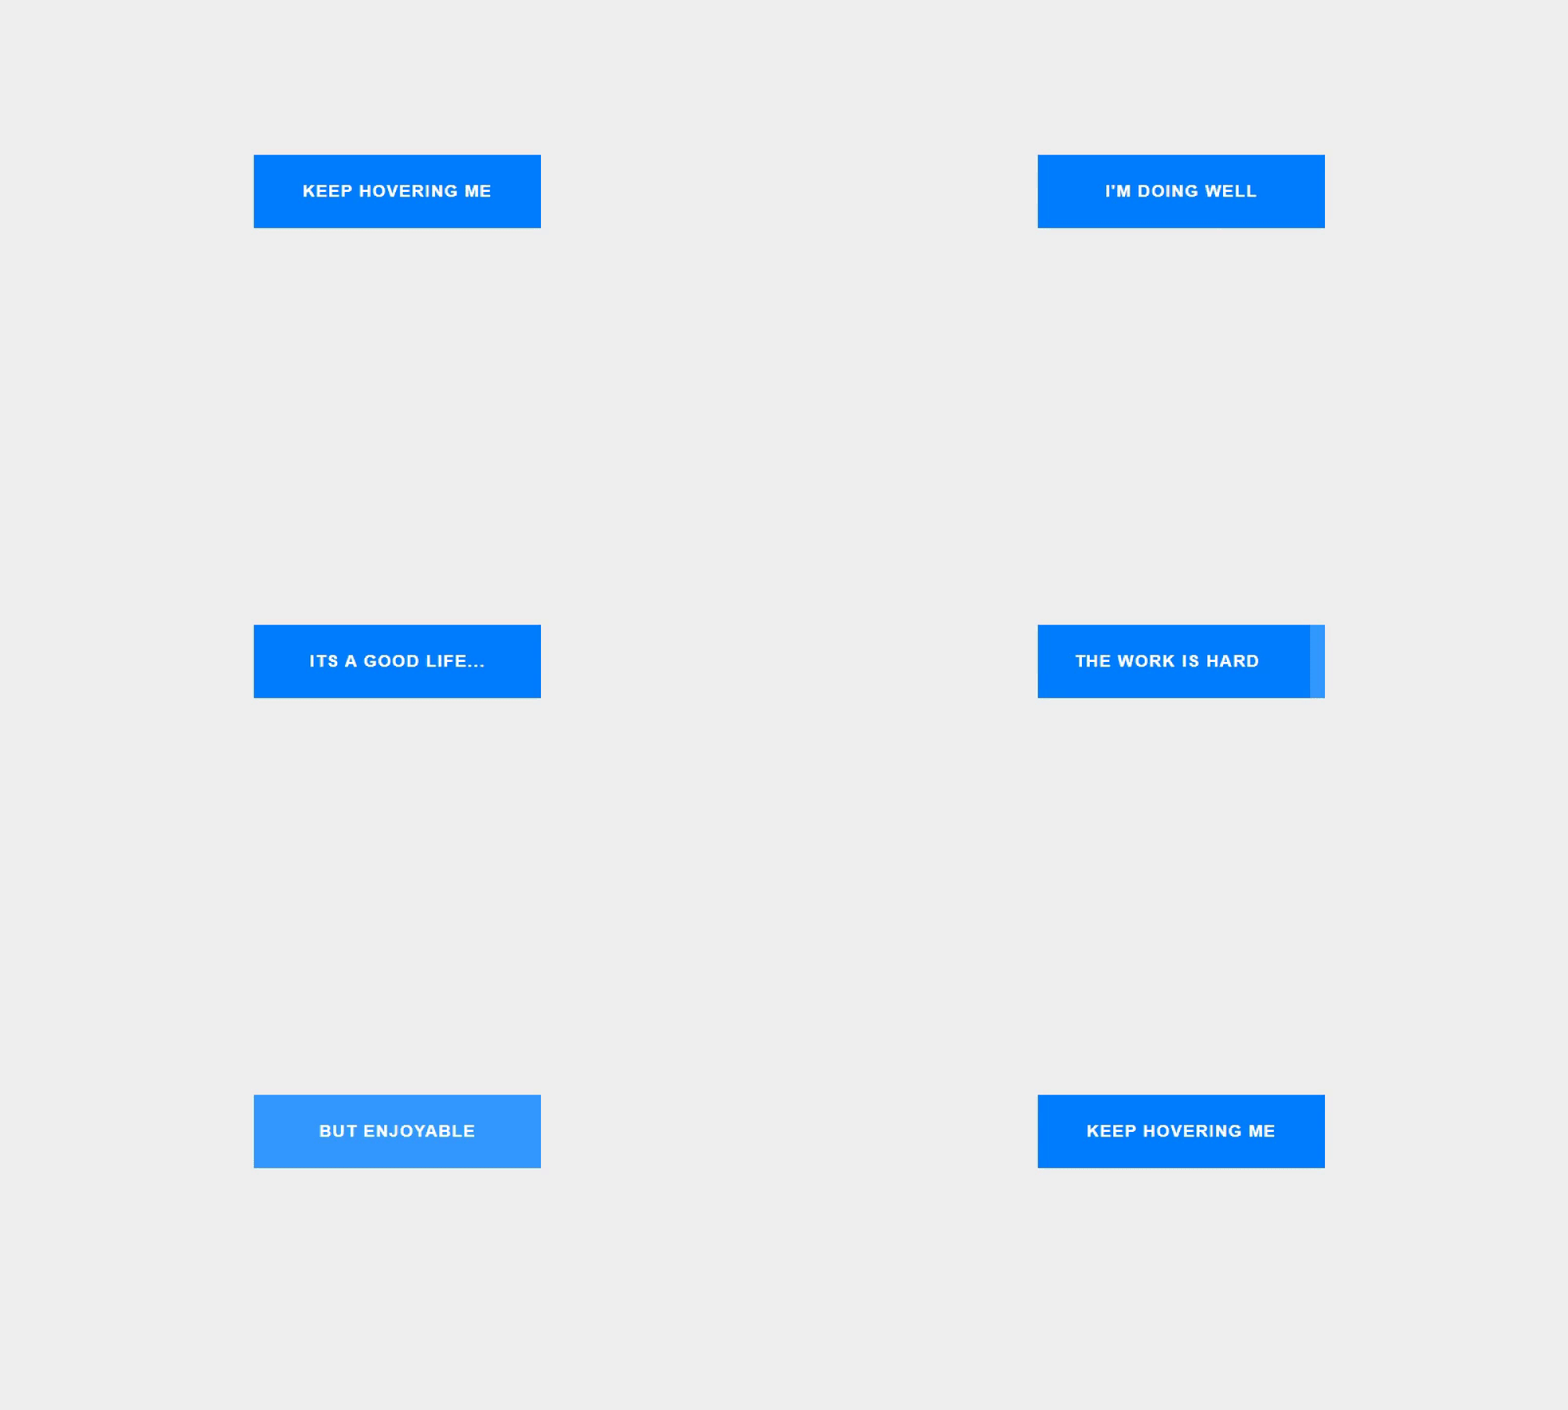
یکی دیگر از کاربردهای هاور، نمایش اطلاعات مخفی است. این کاربرد به طور معمول در طراحی سایتهای فروشگاهی استفاده میشود و با استفاده از آن میتوان کاربر را از سردرگمی نجات داد و پیامها و راهنماییهای لازم، مانند توضیح مختصر یک محصول را خلاصه و ساده به صورت تصویری روی خود المان نمایش داد. با این کار میتوان از کلاسهای استایل تعریف شده برای هاور به طور مستقیم استفاده کرد. در این بخش از مقاله به آموزش نحوه ی ساخت دکمه توضیحی در CSS میپردازیم. برای این کار ابتدا در Html راهنماییها را به صورت متنی در div دکمه قرار میدهیم:
<div class="center">
<div class="button">
  <a class="first"> Keep hovering me </a>
  <a class="slidein"> how are you today? </a>
  <a class="slidein two"> I'm doing well </a>
  <a class="slidein three"> thanks for asking </a>
  <a class="slidein four"> its a good life... </a>
  <a class="slidein five"> ...being a button </a>
  <a class="slidein six"> the work is hard </a>
  <a class="slidein seven"> but enjoyable </a>
  <a class="slidein eight"> yep, its great </a>
  <a class="slidein nine"> ... </a>
  <a class="slidein ten"> save me </a>
</div>
</div>
سپس در بخش CSS، کلاسهای مربوط به هر متن را تعریف کرده و آنها را در هاور میگذاریم:
@import "compass/css3";
body {
  font-family: 'HelveticaNeue-Light', 'Helvetica Neue Light', 'Helvetica Neue', Helvetica, 'Open Sans', sans-serif;
  background: #efefef;
}
.center {
 width: 350px;
  position: absolute;
  left: 50%;
  margin-left: -175px;
  top: 50%;
  margin-top: -100px;
}
.slidein:nth-child( even ) {
  background: lighten( #007eff, 10% ) !important;
}
.slidein:nth-child( odd ) {
  background: #007eff !important;
}
.button {
  cursor: pointer;
  position: relative;
  text-align: center;
  margin: 46px 10px 0 0;
  display: block;
  width: 195px;
  height: 50px;
  text-decoration: none;
  font-size: 0.7em;
  font-weight: 600;
  overflow: hidden;
  margin: auto;
  .ten {
    font-size: 7px;
    line-height: 52px;
  }
  &:hover {
    .slidein {
      left: 0%;
    }
    .two {
      left: 0%;
      transition-delay: 1.5s;
    }
    .three {
      left: 0%;
      transition-delay: 3s;
    }
    .four {
     left: 0%;
     transition-delay: 4.5s;
    }
    .five {
     left: 0%;
     transition-delay: 6s;
    }
    .six {
     left: 0%;
     transition-delay: 7.5s;
    }
    .seven {
     left: 0%;
     transition-delay: 9s;
    }
    .eight {
     left: 0%;
     transition-delay: 10.5s;
    }
    .nine {
     left: 0%;
     transition-delay: 13s;
    }
    .ten {
     left: 0%;
     transition-delay: 16s;
    }
  }
.slidein {
  background: lighten( #007eff, 10% );
  left: -100%;
  z-index: 2;
}
  a {
    text-transform: uppercase;
    transition: left 300ms;
    letter-spacing: 1px;
    background: #007eff;
    position: absolute;
    font-weight: bold;
    z-index: 1;
    top: 0;
    left: 0;
    width: 100%;
    height: 100%;
    color: #ffffff;
    line-height: 50px;
  }
}
.text {
  width: 100%;
  text-align: center;
 text-transform: uppercase;
  font-size: 11px;
  font-weight: bold;
  color: #a0a0a0;
  display: block;
  margin-top: 20px;
  letter-spacing: 1px;
  a {
   text-decoration: none;
    color: #007eff;
  }
}
دکمه ی آیکون دار
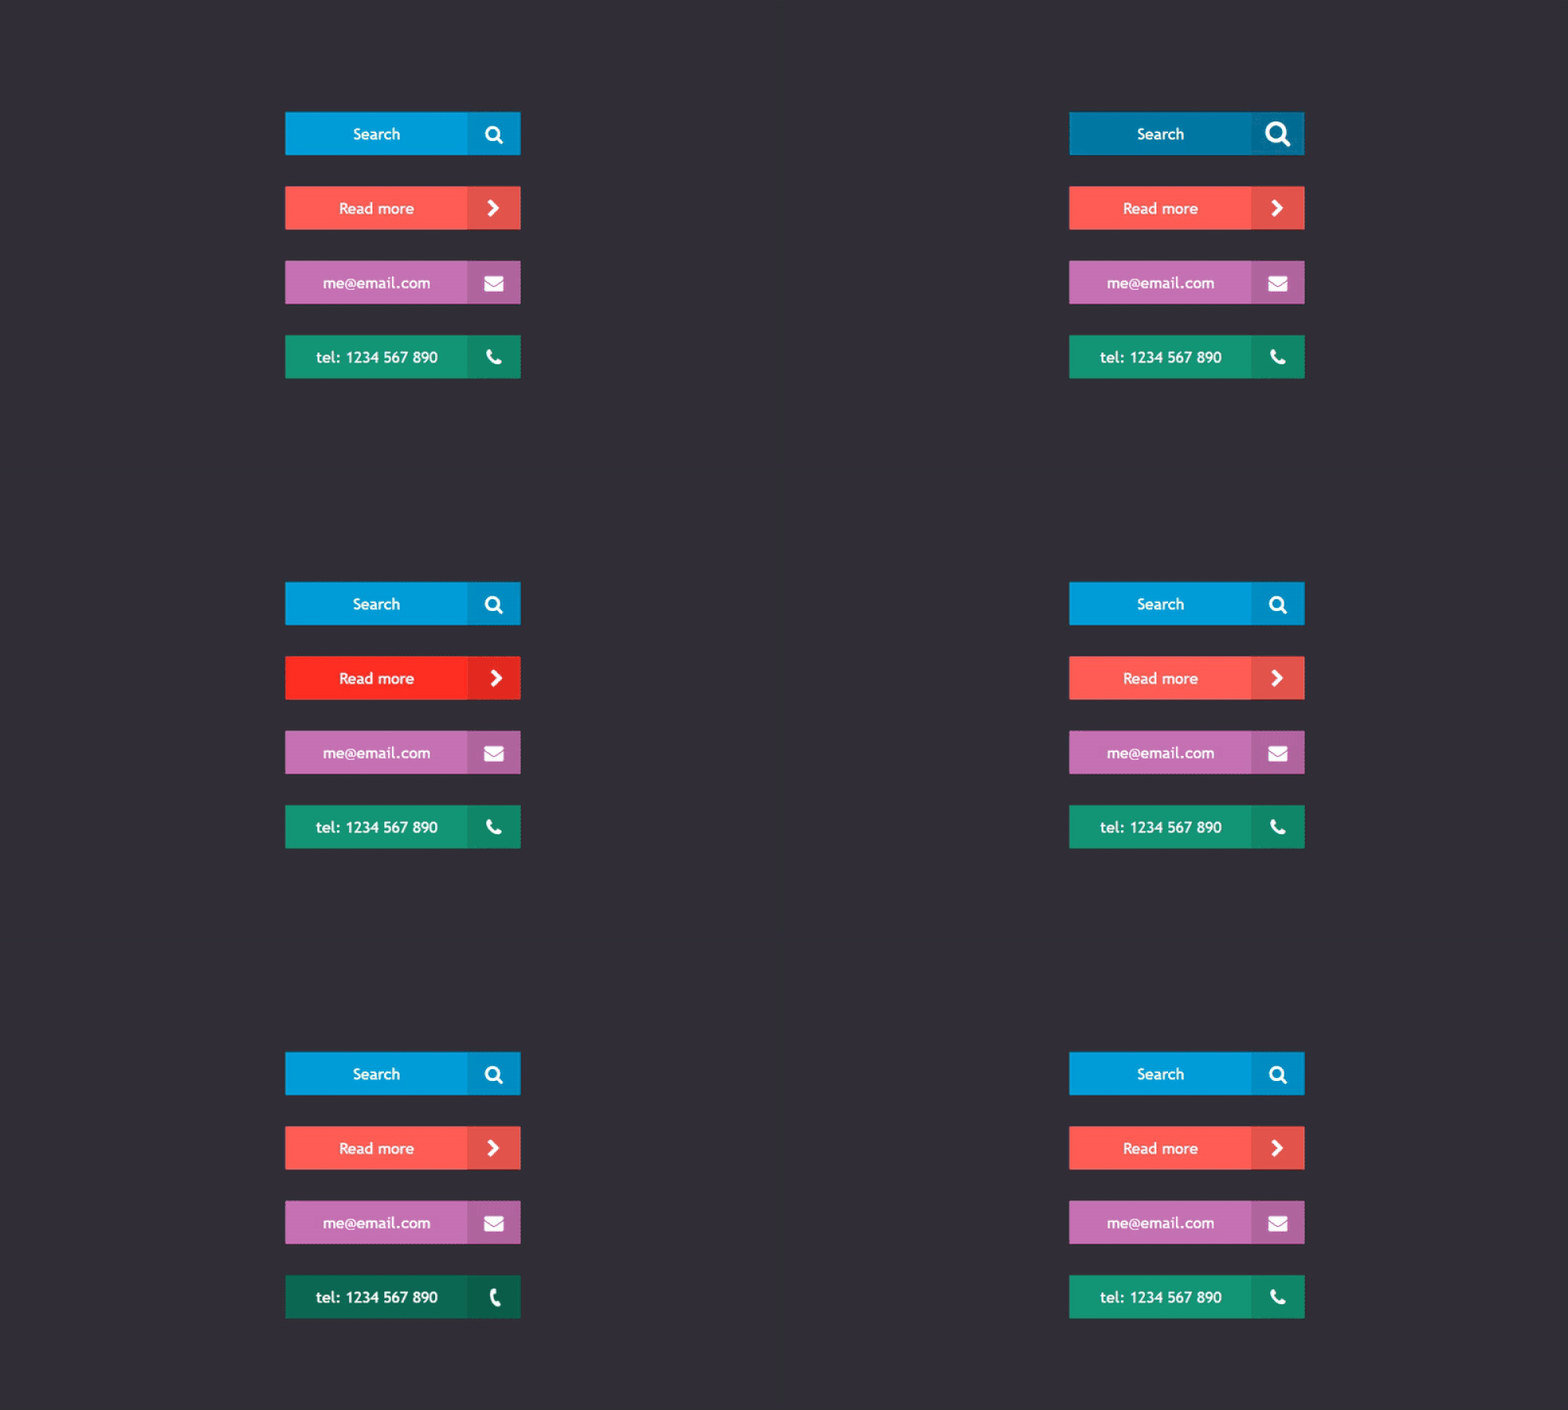
یکی از جذابترین و سادهترین دکمههای CSS، دکمه ی آیکون دار است.در این بخش از مقاله برای مثال چند دکمه تعریف کرده ایم. ابتدا دکمهها را در بخش Html میگذاریم:
<link rel="stylesheet" href="//maxcdn.bootstrapcdn.com/font-awesome/4.3.0/css/font-awesome.min.css">
<link href='https://fonts.googleapis.com/css?family=Droid+Serif:400,700' rel='stylesheet' type='text/css'><button class="button  search">Search</button>
<br/><br/>
<button class="button  arrow">Read more</button>
<br/><br/>
<button class="button  email">me@email.com</button>
<br/><br/>
<button class="button  phone">tel: 1234 567 890</button>
سپس در بخش CSS کلاسهای لازم را تعریف میکنیم:
@button-colour: #009ED8;
@button-text: #ffffff;
@regular-text: #333;
@button-tint: fadeout(#000, 90%);
@background: #303036;
body {
	background: @background;
	text-align: center;
	text-rendering: auto;
	font-size: 17px;
	line-height: 1.6em;
	height: 100vh;
	overflow: hidden;
	padding: 18%;
	padding-top: 25vh;
}
* {
	box-sizing: border-box;
}
.button {
	display: inline-block;
	font-family: "Montserrat", "Trebuchet MS", Helvetica, sans-serif;
	-webkit-font-smoothing: antialiased;
	position: relative;
	padding: .8em 1.4em;
	padding-right: 4.7em;
	background: @button-colour;
	border: none;
	color: white;
	transition: .2s;
	&:before,
	&:after {
		position: absolute;
		top: 0;
		bottom: 0;
		right: 0;
		padding-top: inherit;
		padding-bottom: inherit;
		width: 2.8em;
		content: "\00a0";
		font-family: 'FontAwesome', sans-serif;
		font-size: 1.2em;
		text-align: center;
		transition: .2s;
		transform-origin: 50% 60%;
	}
	&:before {
		background: @button-tint;
	}
	&:hover {
		background: darken(@button-colour, 10%);
	}
	&:active,
	&:focus {
		background: darken(@button-colour, 30%);
		outline: none;
	}
}
.button {
	min-width: 15em;
}
.arrow {
	background: #FE5F55;
	&:hover {
		background: darken(#FE5F55, 10%);
	}
	&:active,
	&:focus {
		background: darken(#FE5F55, 30%);
	}
	&:after {
		content: "\F054";
	}
	&:hover:after {
		-webkit-animation: bounceright .3s alternate ease infinite;
		animation: bounceright .3s alternate ease infinite;
	}
}
.phone {
	background: #139675;
	&:hover {
		background: darken(#139675, 10%);
	}
	&:active,
	&:focus {
		background: darken(#139675, 20%);
	}
	&:after {
		content: "\F095";
	}
	&:hover:after {
		-webkit-animation: wiggle .05s alternate ease infinite;
		animation: wiggle .05s alternate ease infinite;
	}
}
.email {
	background: #C673B3;
	&:hover {
		background: darken(#C673B3, 10%);
	}
	&:active,
	&:focus {
		background: darken(#C673B3, 20%);
	}
	&:after {
		content: "\F0E0";
	}
	&:hover:after {
		-webkit-animation: none;
		-webkit-transform: skew(-20deg);
		animation: none;
		transform: skew(-20deg);
		text-indent: .1em;
	}
}
.search {
	&:after {
		content:"\f002";
	}
	&:hover:after {
		-webkit-animation: none;
		-webkit-transform: scale(1.4);
		animation: none;
		transform: scale(1.4);
	}
}
@-webkit-keyframes bounceright {
	from { -webkit-transform: translateX(0); }
	to   { -webkit-transform: translateX(3px); }
}
@-webkit-keyframes wiggle {
	from { -webkit-transform: rotate(0deg); }
	to   { -webkit-transform: rotate(30deg); }
}
@keyframes bounceright {
	from { transform: translateX(0); }
	to   { transform: translateX(3px); }
}
@keyframes wiggle {
	from { transform: rotate(0deg); }
	to   { transform: rotate(30deg); }
}
دکمه ی شبکههای اجتماعی
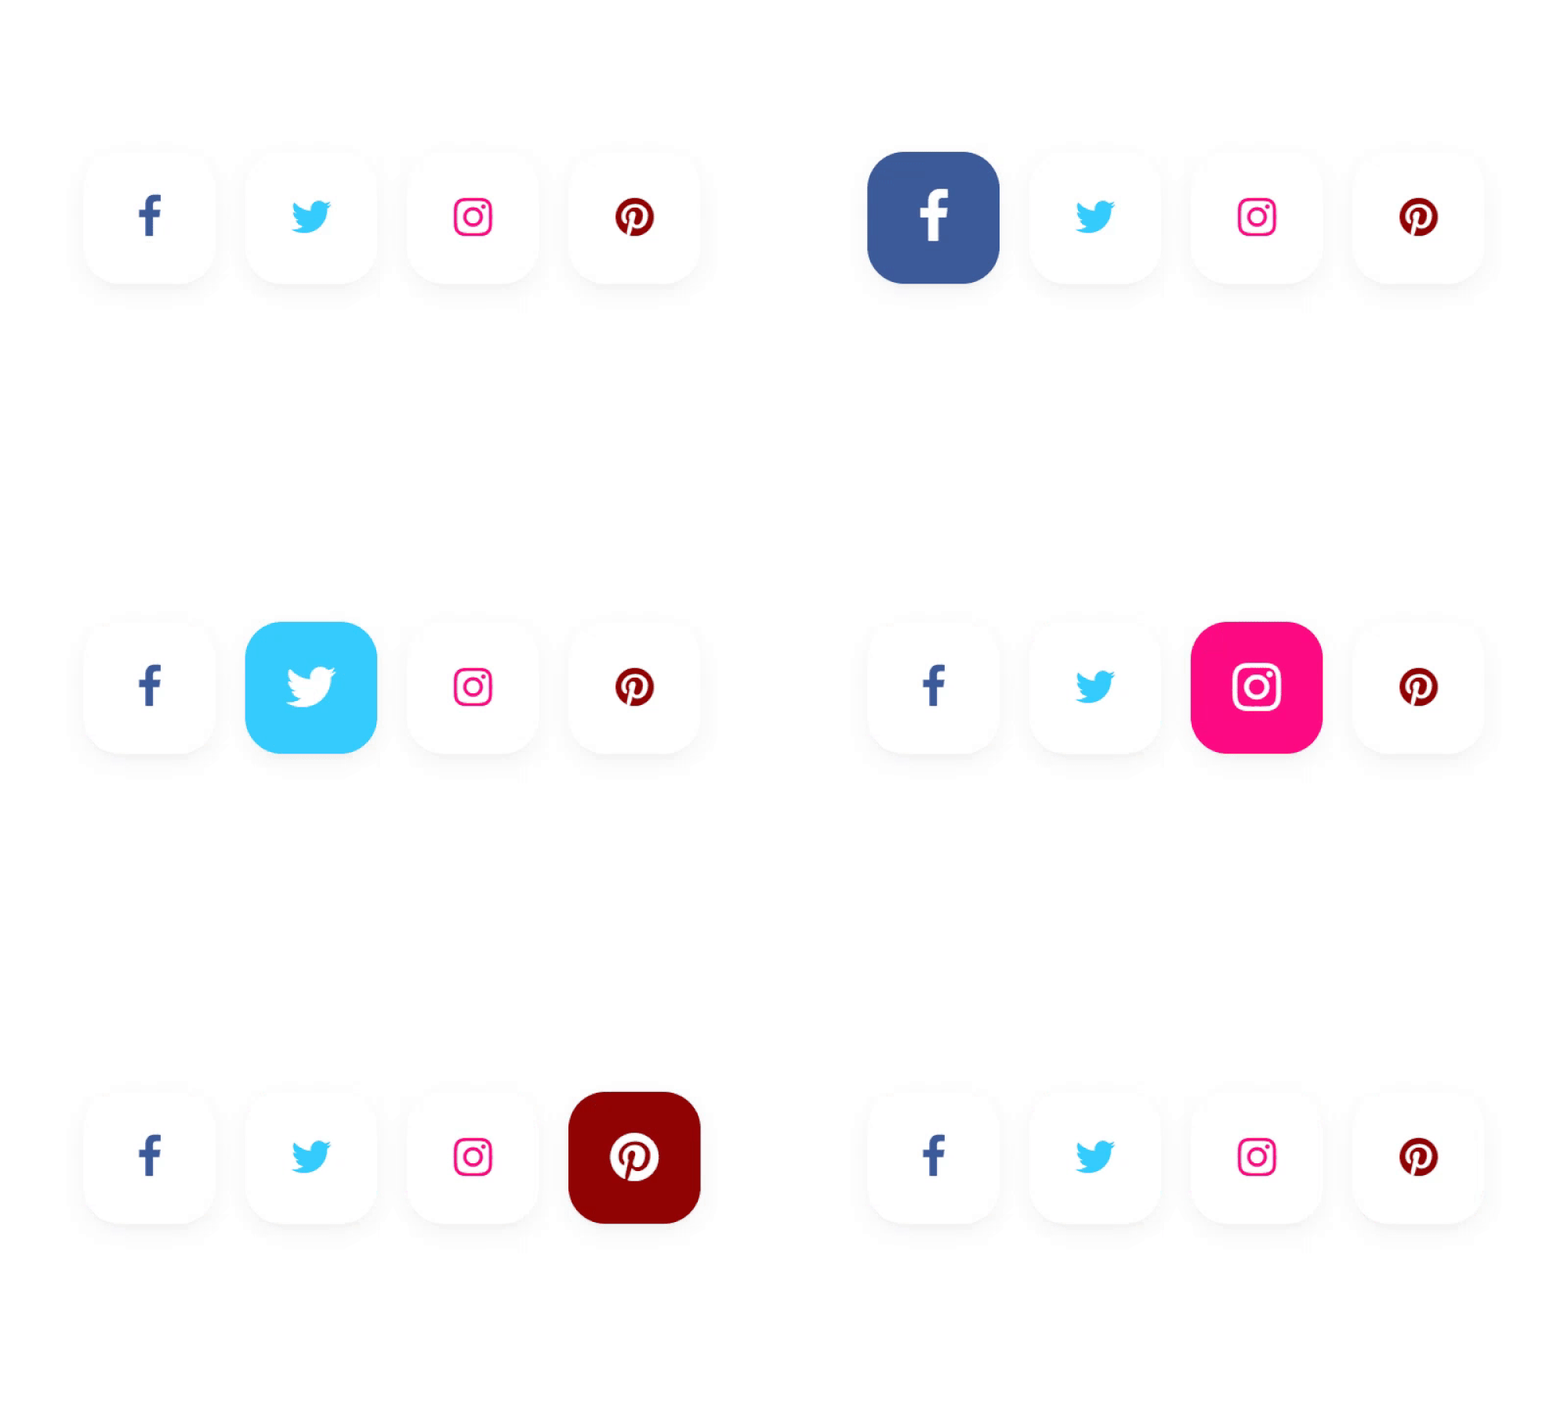
در این بخش از مقاله ی آموزش ساخت دکمه با HTML به آموزش ساخت دکمههای زیبا شبکههای اجتماعی با CSS میپردازیم.
با استفاده از هاور میتوان افکتهای زیبایی برای دکمه ی شبکههای اجتماعی طراحی کرد. برای شروع آیکون شبکههای اجتماعی را اضافه کرده و چهار دکمه برای فیس بوک، توییتر، اینستاگرام و پینترست در صفحه قرار میدهیم:
<link rel="stylesheet" href="https://cdnjs.cloudflare.com/ajax/libs/font-awesome/4.7.0/css/font-awesome.min.css">
<div class="social-btns">
    <a class="btn facebook" href="#"><i class="fa fa-facebook"></i></a>
    <a class="btn twitter" href="#"><i class="fa fa-twitter"></i></a>
    <a class="btn instagram" href="#"><i class="fa fa-instagram"></i></a>
    <a class="btn pinterest" href="#"><i class="fa fa-pinterest"></i></a>
</div>
در استایل سعی میکنیم ویژگی مشترک این دکمهها را در یک کلاس برای قبل و بعد از ورود نشانگر به دکمه تعریف کنیم و تنها برای تعیین رنگ از کلاسهای جدا استفاده میکنیم:
.social-btns .btn,
.social-btns .btn:before,
.social-btns .btn .fa {
  transition: all 0.35s;
  transition-timing-function: cubic-bezier(0.31, -0.105, 0.43, 1.59);
}
.social-btns .btn:before {
  top: 90%;
  left: -110%;
}
.social-btns .btn .fa {
  -webkit-transform: scale(0.8);
  transform: scale(0.8);
}
.social-btns .btn.facebook:before {
  background-color: #3B5998;
}
.social-btns .btn.facebook .fa {
  color: #3B5998;
}
.social-btns .btn.twitter:before {
  background-color: #33CCFF;
}
.social-btns .btn.twitter .fa {
  color: #33CCFF;
}
.social-btns .btn.instagram:before {
  background-color: #FE0883;
}
.social-btns .btn.instagram .fa {
  color: #FE0883;
}
.social-btns .btn.pinterest:before {
  background-color: #910101;
}
.social-btns .btn.pinterest .fa {
  color: #910101;
}
.social-btns .btn:focus:before,
.social-btns .btn:hover:before {
  top: -10%;
  left: -10%;
}
.social-btns .btn:focus .fa,
.social-btns .btn:hover .fa {
  color: #fff;
  -webkit-transform: scale(1);
  transform: scale(1);
}
.social-btns {
  height: 90px;
  margin: auto;
  font-size: 0;
  text-align: center;
  position: absolute;
  top: 0;
  bottom: 0;
  left: 0;
  right: 0;
}
.social-btns .btn {
  display: inline-block;
  background-color: #fff;
  width: 90px;
  height: 90px;
  line-height: 90px;
  margin: 0 10px;
  text-align: center;
  position: relative;
  overflow: hidden;
  border-radius: 28%;
  box-shadow: 0 5px 15px -5px rgba(0, 0, 0, 0.1);
  opacity: 0.99;
}
.social-btns .btn:before {
  content: "";
  width: 120%;
  height: 120%;
  position: absolute;
  -webkit-transform: rotate(45deg);
  transform: rotate(45deg);
}
.social-btns .btn .fa {
  font-size: 38px;
  vertical-align: middle;
}
دکمه ی تبلیغاتی
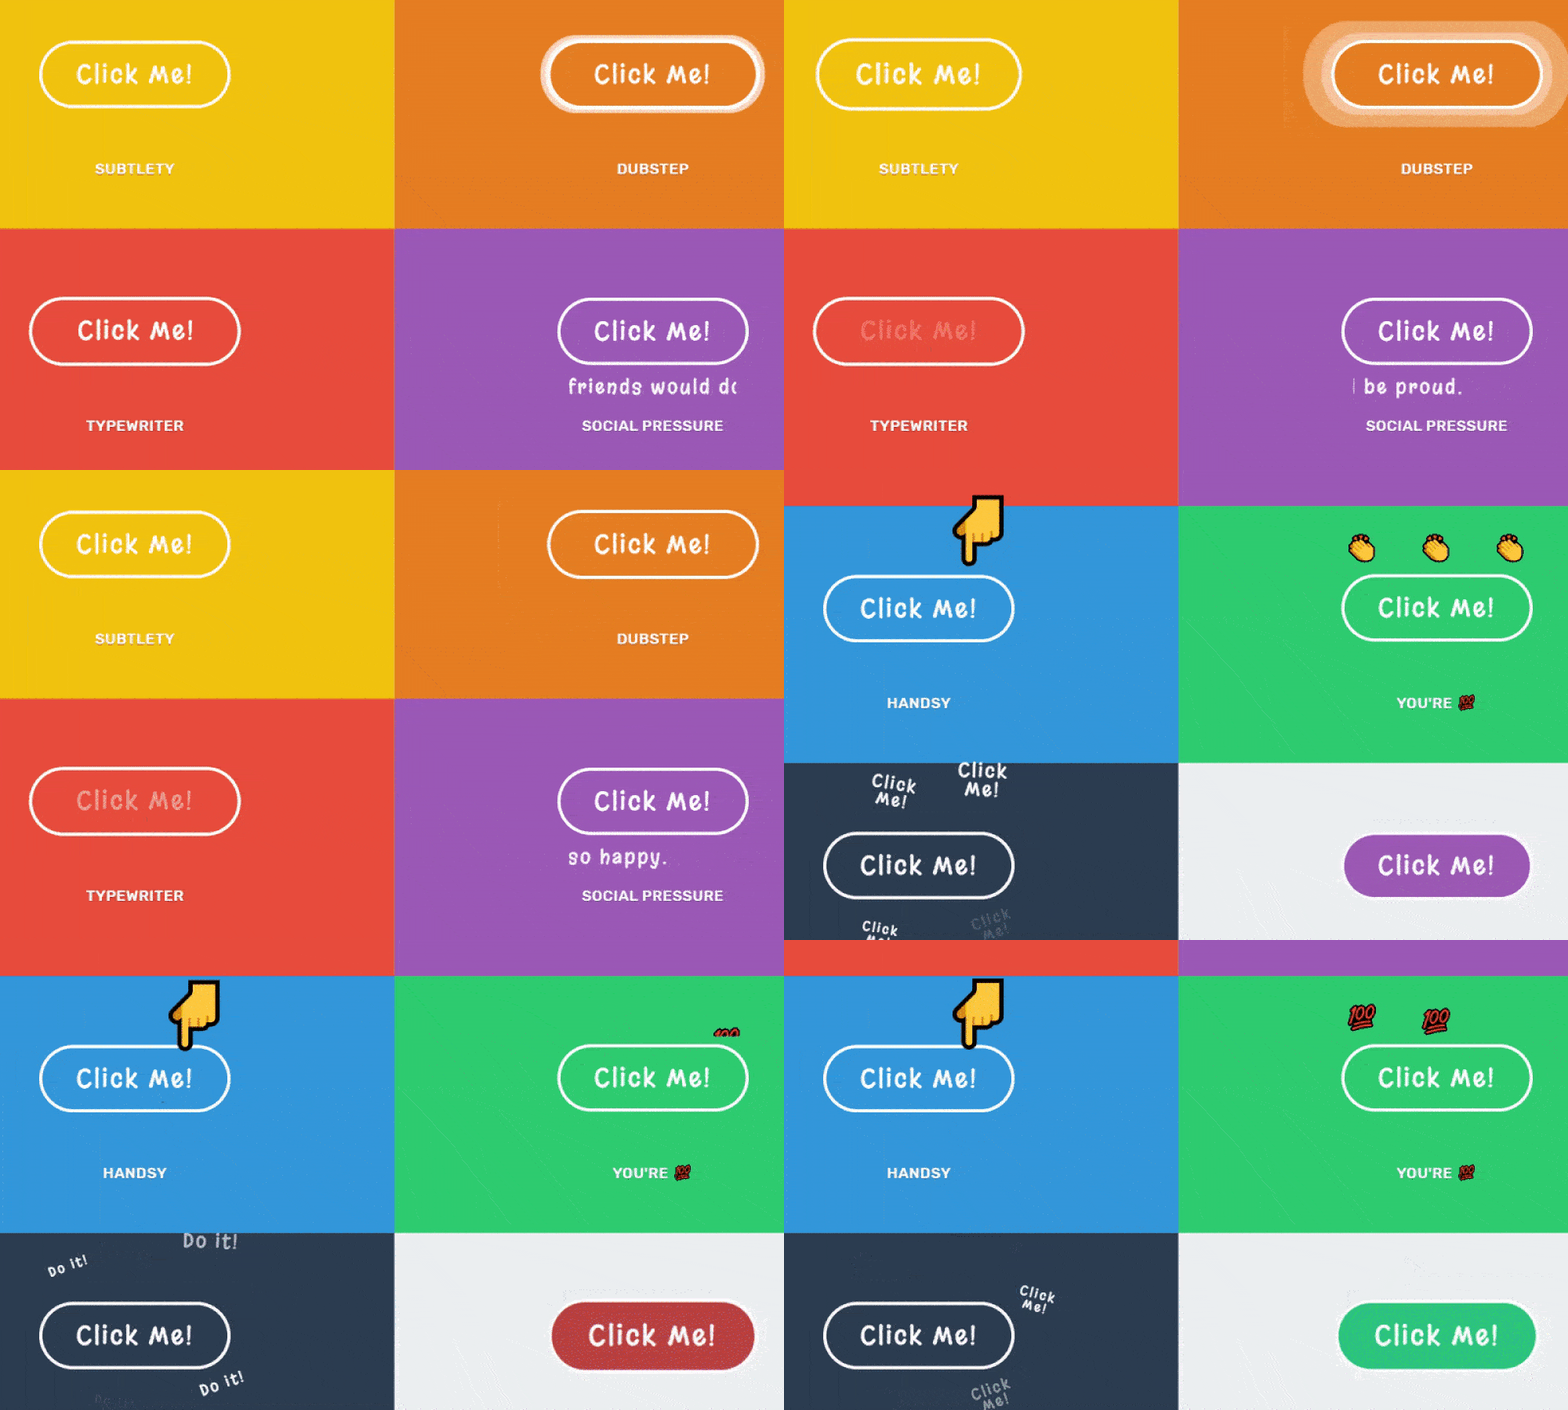
یکی از سوالات مهمی که هر طراح رابط کاربری باید هنگام طراحی به آن توجه کند، این است که کاربران چگونه میتوانند یک دکمه را تشخیص دهند؟ پاسخ ساده است. نشانههای بصری به افراد کمک میکنند تا بفهمند باید روی یک المان کلیک کنند یا خیر. یکی از مهمترین راه ها، طراحی ظاهری مناسب و استفاده از افکتهای تصویری مناسب عنصر است. دکمههای تبلیغاتی عناصری هستند که معمولا دارای افکتهای انیمیشنی فراوان برای جلب توجه بیننده هستند. در ادامه مقاله ی آموزش ساخت دکمه با HTML به آموزش ساخت دکمههای زیبا تبلیغاتی با CSS میپردازیم. در بخش Html داریم:
.main-content
	.item.button-jittery(style="--bg-color: #f1c40f;")
		button Click Me!
		.name Subtlety
	.item.button-pulse(style="--bg-color: #e67e22")
		.button__wrapper
			.pulsing
			button Click Me!
		.name Dubstep
	.item.button-typewriter(style="--bg-color: #e74c3c")
		.button__wrapper
			button
				p Click Me!
		.name Typewriter
	.item.button-pressure(style="--bg-color: #9b59b6")
		button Click Me!
			marquee(scrollamount="12")
				span Your friends would do it.
				span Your mum would be proud.
				span Your partner would be so happy.
				span Your cat would love you for it.
		.name Social Pressure
	.item.button-hand(style="--bg-color: #3498db")
		button Click Me!
			.hands
		.name Handsy
	.item.button-100(style="--bg-color:#2ecc71")
		button Click Me!
			- for (var i=1; i<4; i++)
				.emoji
		.name You're ?
	.item.button-parrot(style="--bg-color: #2c3e50")
		button Click Me!
			- for (var i=1; i<7; i++)
				.parrot
		.name Encouragement
	.item.button-rainbow(style="--bg-color: #ecf0f1")
		button Click Me!
			.rainbow
		.name Rainbow
	.item.footer(style="--bg-color: #7f8c8d")
		.explanation
			| Part of the
			a(href="https://codepen.io/collection/XJNKLz/" target="_blank") CSS Animations collection here
			|  .
			footer
				a(href="https://twitter.com/meowlivia_" target="_blank")
					i.icon-social-twitter.icons
				a(href="https://github.com/oliviale" target="_blank")
					i.icon-social-github.icons
				a(href="https://dribbble.com/oliviale" target="_blank")
					i.icon-social-dribbble.icons
و در بخش CSS مینویسیم:
body {
	color: #fff;
	font-family: "Rubik", sans-serif;
}
.item.footer {
	flex-wrap: wrap;
	padding: 5rem;
	text-align: center;
	font-size: 18px;
	line-height: 1.7;
	grid-column: span 1;
	@media screen and (min-width:823px) and (max-width:1223px) {
		grid-column: span 2;
	}
	a {
		text-decoration: none;
		color: #fff;
		padding: 3px 0;
		border-bottom: 1px dashed;
		&:hover {
			border-bottom: 1px solid;
		}
	}
}
footer {
	margin-top: 1.5rem;
	a {
		text-decoration: none;
		display: inline-block;
		width: 45px;
		height: 45px;
		border-radius: 50%;
		background: transparent;
		border: 1px dashed #fff;
		color: #fff;
		margin: 5px;
		&:hover {
			background: rgba(255, 255, 255, 0.1);
		}
		.icons {
			margin-top: 8px;
			display: inline-block;
			font-size: 20px;
			&:before {
				position: relative;
			}
		}
	}
}
* {
	box-sizing: border-box;
	&:before,
	&:after {
		content: "";
		position: absolute;
	}
}
.main-content {
	display: grid;
	width: 100%;
	grid-template-columns: repeat(auto-fit, minmax(400px, 1fr));
	.item {
		display: grid;
		grid-template-rows: 1fr min-content;
		align-items: center;
		justify-content: center;
		height: 50vh;
		flex-wrap: wrap;
		background: var(--bg-color);
		&:not(.footer) {
			padding-top: 1rem;
		}
	}
}
button {
	background: transparent;
	color: #fff;
	border: 3px solid #fff;
	border-radius: 50px;
	padding: 0.8rem 2rem;
	font: 24px "Margarine", sans-serif;
	outline: none;
	cursor: pointer;
	position: relative;
	transition: 0.2s ease-in-out;
	letter-spacing: 2px;
}
.name {
	width: 100%;
	text-align: center;
	padding: 0 0 3rem;
	font: 500 14px 'Rubik', sans-serif;
	letter-spacing: .5px;
	text-transform: uppercase;
	text-shadow: 0 1px 1px rgba(0,0,0,0.4);
}
.button__wrapper {
	display: inline-block;
	position: relative;
	width: 200px;
	height: 65px;
	display: flex;
	justify-content: center;
	align-items: center;
}
.button-pulse {
	button {
		background: var(--bg-color);
		width: 100%;
		height: 100%;
		position: absolute;
		top: 0;
		left: 0;
		z-index: 2;
	}
	.button__wrapper:hover .pulsing {
		&:before {
			animation: pulsing 0.2s linear infinite;
		}
		&:after {
			animation: pulsing1 0.2s linear infinite;
		}
	}
}
.pulsing {
	width: 99%;
	height: 99%;
	border-radius: 50px;
	z-index: 1;
	position: relative;
	&:before,
	&:after {
		width: 100%;
		height: 100%;
		border: inherit;
		top: 0;
		left: 0;
		z-index: 0;
		background: #fff;
		border-radius: inherit;
		animation: pulsing 2.5s linear infinite;
	}
	&:after {
		animation: pulsing1 2.5s linear infinite;
	}
}
@keyframes pulsing {
	0% {
		opacity: 1;
		transform: scaleY(1) scaleX(1);
	}
	20% {
		opacity: 0.5;
	}
	70% {
		opacity: 0.2;
		transform: scaleY(1.8) scaleX(1.4);
	}
	80% {
		opacity: 0;
		transform: scaleY(1.8) scaleX(1.4);
	}
	90% {
		opacity: 0;
		transform: scaleY(1) scaleX(1);
	}
}
@keyframes pulsing1 {
	0% {
		opacity: 1;
		transform: scaleY(1) scaleX(1);
	}
	20% {
		opacity: 0.5;
	}
	70% {
		opacity: 0.2;
		transform: scaleY(1.3) scaleX(1.15);
	}
	80% {
		opacity: 0;
		transform: scaleY(1.3) scaleX(1.15);
	}
	90% {
		opacity: 0;
		transform: scaleY(1) scaleX(1);
	}
}
.button-typewriter {
	button {
		width: 100%;
		height: 100%;
	}
	p {
		animation: typing 4s steps(12) infinite;
		display: inline-block;
		overflow: hidden;
		white-space: nowrap;
	}
	.button__wrapper:hover p {
		animation: blink 0.3s infinite;
	}
}
@keyframes typing {
	0% {
		width: 0;
	}
	50% {
		width: 100%;
	}
	55%,
	65%,
	75% {
		opacity: 1;
	}
	60%,
	70% {
		opacity: 0;
	}
	80% {
		width: 100%;
	}
	100% {
		width: 0;
	}
}
.button-parrot {
	.parrot {
		position: absolute;
		width: 60px;
		text-align: center;
		animation: blink 0.8s infinite;
		color: transparent;
		&:before {
			content: "Click Me!";
		}
		&:nth-child(1) {
			top: -30px;
			left: -40px;
			font: 12px/1 "Margarine", sans-serif;
			transform: rotate(-20deg);
			animation-duration: 0.5s;
		}
		&:nth-child(2) {
			font: 12px/1 "Margarine", sans-serif;
			right: -40px;
			top: -20px;
			transform: rotate(15deg);
			animation-duration: 0.3s;
		}
		&:nth-child(3) {
			font: 16px/1 "Margarine", sans-serif;
			top: -60px;
			left: 15px;
			transform: rotate(10deg);
			animation-duration: 1s;
		}
		&:nth-child(4) {
			font: 18px/1 "Margarine", sans-serif;
			top: -70px;
			left: 95px;
			transform: rotate(2deg);
			animation-duration: 0.7s;
		}
		&:nth-child(5) {
			font: 14px/1 "Margarine", sans-serif;
			top: 80px;
			left: 105px;
			transform: rotate(-20deg);
			animation-duration: 0.8s;
		}
		&:nth-child(6) {
			font: 12px/1 "Margarine", sans-serif;
			top: 80px;
			left: 5px;
			transform: rotate(10deg);
			animation-duration: 1.2s;
		}
	}
	button:hover .parrot:before {
		content: "Do it!";
		width: 70px;
	}
}
@keyframes blink {
	25%,
	75% {
		color: transparent;
	}
	40%,
	60% {
		color: #fff;
	}
}
.button-hand button {
	&:before {
		content: "?";
		font-size: 60px;
		transform: scaleX(-1);
		right: 0px;
		top: -68px;
		animation: up-down 1s infinite;
	}
	.hands {
		&:before,
		&:after {
			content: "?";
			font-size: 40px;
			opacity: 0;
			transition: 0.4s ease-in-out;
		}
		&:before {
			transform: rotate(-60deg);
			left: -45px;
			top: -10px;
		}
		&:after {
			transform: rotate(170deg);
			right: 30px;
			top: 50px;
		}
	}
	&:hover .hands {
		&:before {
			opacity: 1;
			left: -35px;
		}
		&:after {
			opacity: 1;
			top: 40px;
		}
	}
}
@keyframes up-down {
	50% {
		margin-top: -20px;
	}
}
.button-100 {
	.emoji {
		position: absolute;
		top: -45px;
		left: 0;
		width: 35px;
		height: 35px;
		overflow: hidden;
		&:before {
			content: "?";
			display: inline-block;
			animation: give-score 2.5s infinite;
			position: relative;
			top: 0;
		}
		&:nth-child(2) {
			left: 0;
			right: 0;
			margin: auto;
			&:before {
				animation: give-score 2.5s infinite 0.2s;
			}
		}
		&:nth-child(3) {
			left: auto;
			right: 0;
			&:before {
				animation: give-score 2.5s infinite 0.4s;
			}
		}
	}
	button:hover .emoji:before {
		content: "?";
		transition: 0.5s ease;
	}
}
@keyframes give-score {
	30%,
	80% {
		top: 0;
	}
	40%,
	70% {
		top: 50px;
	}
}
.button-pressure {
	marquee {
		position: absolute;
		width: 90%;
		top: 125%;
		left: 5%;
		font: 18px/1 "Margarine", sans-serif;
		span {
			display: inline-block;
			height: 20px;
			&:not(:last-child) {
				margin-right: 130px;
			}
		}
	}
	button:before {
		content: "OMG YAS";
		transition: 0.5s ease;
		left: 0;
		right: 0;
		margin: auto;
		top: -15px;
		font-size: 12px;
		opacity: 0;
	}
	button:hover:before {
		animation: omg-yes 1s;
	}
}
.button-rainbow button {
	animation: rainbow 3s infinite, heartbeat 0.6s infinite;
	background: #c0392b;
	.rainbow {
		width: 120px;
		height: 120px;
		border-radius: 50%;
		position: absolute;
		left: 0;
		right: 0;
		margin: auto;
		top: -40px;
		transition: 0.5s ease;
		opacity: 0;
		transform: rotate(0);
		&:before {
			content: "?";
			left: 0;
		}
	}
	&:hover .rainbow {
		opacity: 1;
		animation: rotate-nonstop 0.2s infinite;
	}
	+ .name {
		color: #444;
	}
}
@keyframes rotate-nonstop {
	50% {
		transform: rotate(92deg);
	}
}
@keyframes omg-yes {
	50% {
		opacity: 1;
	}
	100% {
		top: -50px;
	}
}
@keyframes rainbow {
	0% {
		background: #1abc9c;
	}
	10% {
		background: #2ecc71;
	}
	20% {
		background: #3498db;
	}
	30% {
		background: #9b59b6;
	}
	40% {
		background: #e74c3c;
	}
	50% {
		background: #e67e22;
	}
	60% {
		background: #f1c40f;
	}
	70% {
		background: #2c3e50;
	}
	80% {
		background: #9b59b6;
	}
}
.button-jittery button {
	animation: jittery 4s infinite;
	&:hover {
		animation: heartbeat 0.2s infinite;
	}
}
@keyframes jittery {
	5%,
	50% {
		transform: scale(1);
	}
	10% {
		transform: scale(0.9);
	}
	15% {
		transform: scale(1.15);
	}
	20% {
		transform: scale(1.15) rotate(-5deg);
	}
	25% {
		transform: scale(1.15) rotate(5deg);
	}
	30% {
		transform: scale(1.15) rotate(-3deg);
	}
	35% {
		transform: scale(1.15) rotate(2deg);
	}
	40% {
		transform: scale(1.15) rotate(0);
	}
}
@keyframes heartbeat {
	50% {
		transform: scale(1.1);
	}
}
دکمه ی سه بعدی
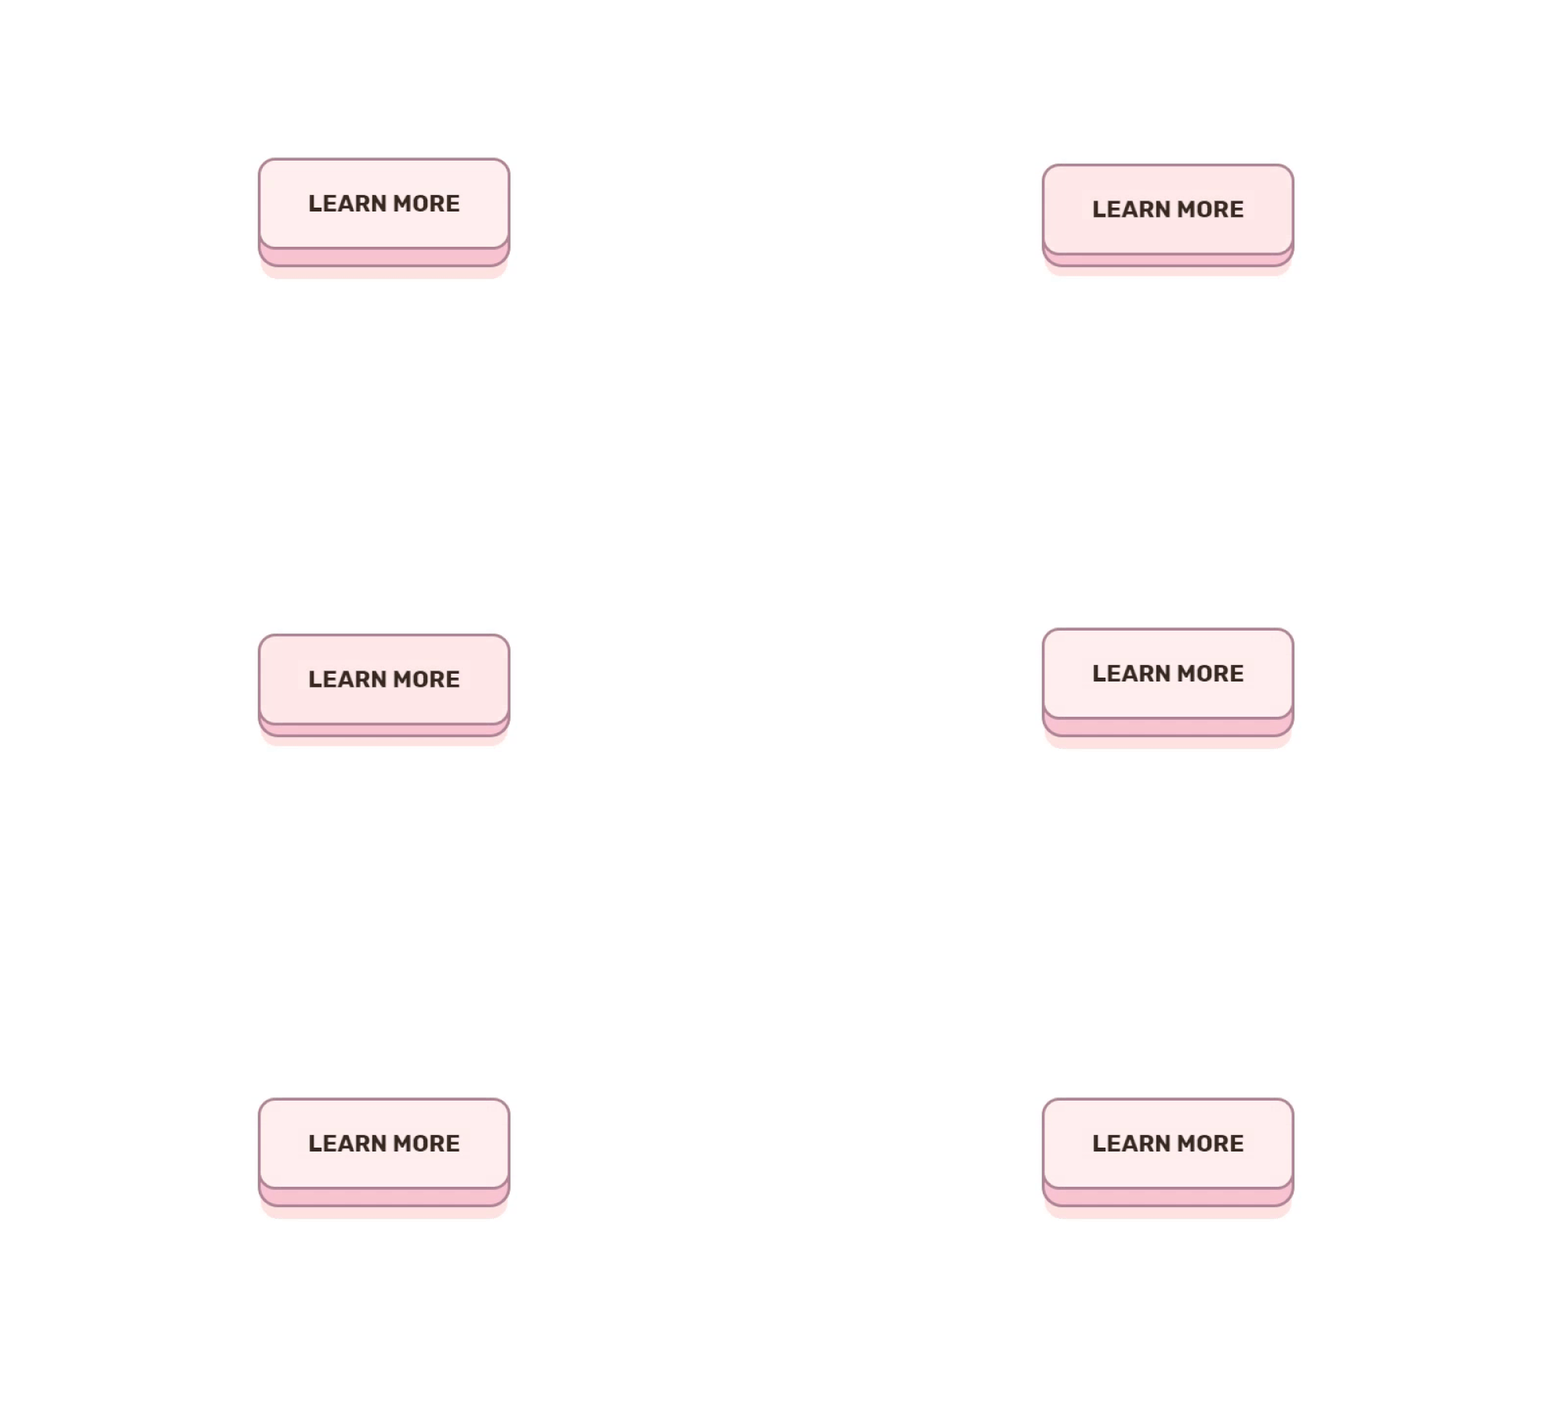
بسیاری از طراحان مایلند تا دکمههای سه بعدی طراحی کنند. طراحی این دکمهها از لحاظ ظاهری با استفاده از ویژگیهای تعریف شده برای حاشیه (border) انجام شده و فقط برای قسمت فرورفتن از هاور استفاده میشود. در این بخش از مقاله ی آموزش ساخت دکمه با HTML به آموزش ساخت دکمههای زیبا سه بعدی با CSS میپردازیم. برای شروع در بخش Html دکمه را تعریف میکنیم:
<button class="learn-more">Learn More</button>سپس در بخش CSS داریم:
@import url('https://fonts.googleapis.com/css?family=Rubik:700&display=swap');
$bg: #fff;
$text: #382b22;
$light-pink: #fff0f0;
$pink: #ffe9e9;
$dark-pink: #f9c4d2;
$pink-border: #b18597;
$pink-shadow: #ffe3e2;
* {
  box-sizing: border-box;
  &::before, &::after {
    box-sizing: border-box;
  }
}
body {
  font-family: 'Rubik', sans-serif;
  font-size: 1rem;
  line-height: 1.5;
  display: flex;
  align-items: center;
  justify-content: center;
  margin: 0;
  min-height: 100vh;
  background: $bg;
}
button {
  position: relative;
  display: inline-block;
  cursor: pointer;
  outline: none;
  border: 0;
  vertical-align: middle;
  text-decoration: none;
  font-size: inherit;
  font-family: inherit;
  &.learn-more {
    font-weight: 600;
    color: $text;
    text-transform: uppercase;
    padding: 1.25em 2em;
    background: $light-pink;
    border: 2px solid $pink-border;
    border-radius: 0.75em;
    transform-style: preserve-3d;
    transition: transform 150ms cubic-bezier(0, 0, 0.58, 1), background 150ms cubic-bezier(0, 0, 0.58, 1);
    &::before {
      position: absolute;
      content: '';
      width: 100%;
      height: 100%;
      top: 0;
      left: 0;
      right: 0;
      bottom: 0;
      background: $dark-pink;
      border-radius: inherit;
      box-shadow: 0 0 0 2px $pink-border, 0 0.625em 0 0 $pink-shadow;
      transform: translate3d(0, 0.75em, -1em);
      transition: transform 150ms cubic-bezier(0, 0, 0.58, 1), box-shadow 150ms cubic-bezier(0, 0, 0.58, 1);
    }
    &:hover {
      background: $pink;
      transform: translate(0, 0.25em);
      &::before {
        box-shadow: 0 0 0 2px $pink-border, 0 0.5em 0 0 $pink-shadow;
        transform: translate3d(0, 0.5em, -1em);
      }
    }
    &:active {
      background: $pink;
      transform: translate(0em, 0.75em);
      &::before {
        box-shadow: 0 0 0 2px $pink-border, 0 0 $pink-shadow;
        transform: translate3d(0, 0, -1em);
      }
    }
  }
}
دکمه ی گرادیانت دار
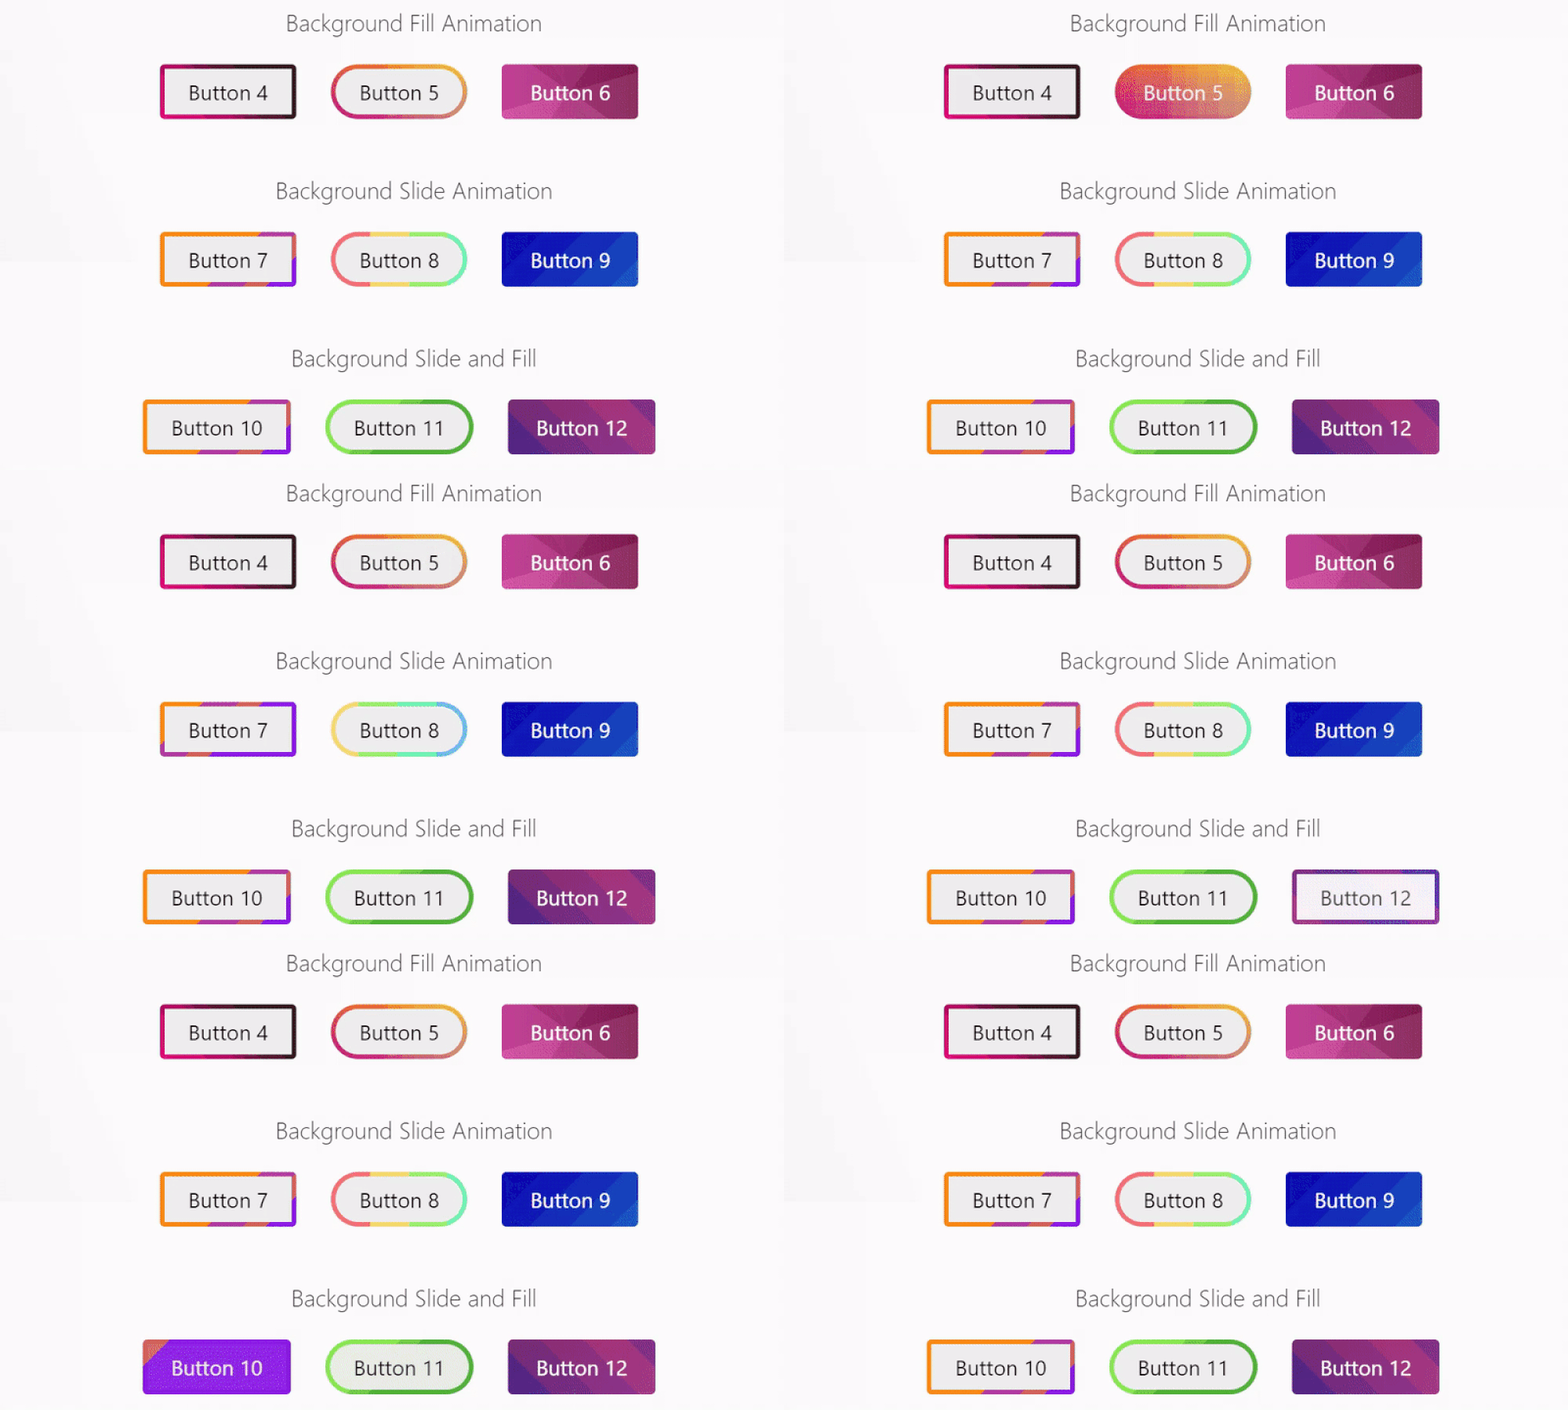
از وقتی که گرادیانتها در طراحی به کار میرود، روز به روز شاهد ایجاد راههای جدید و خلاقانه برای کار با آنها هستیم. از طیفهای رنگی میتوان در حاشیه، زمینه ی دکمه و یا ایجاد افکت استفاده کرد. در این بخش از مقاله ی آموزش ساخت دکمه با HTML به آموزش ساخت دکمههای زیبا گرادیانت دار با CSS میپردازیم. کد زیر شامل چند نمونه از دکمههای طراحی شده با گرادیانت است. کد Html:
<div class="container text-center">
  <div class="row mt-5">
    <div class="col-sm-12">
      <h5 class="mb-4 font-weight-light">No Animation</h5>
      <button class="gb gb-bordered" id="gb1">Button 1</button>
      <button class="gb gb-bordered gb-rounded" id="gb2">Button 2</button>
      <button class="gb" id="gb3">Button 3</button>
    </div>
  </div>
  <div class="row mt-5">
    <div class="col-sm-12">
      <h5 class="mb-4 font-weight-light">Background Fill Animation</h5>
      <button class="gb gb-bordered hover-fill" id="gb4">Button 4</button>
      <button class="gb gb-bordered hover-fill gb-rounded" id="gb5">Button 5</button>
      <button class="gb gb-bordered hover-fill reverse" id="gb6">Button 6</button>
    </div>
  </div>
  <div class="row mt-5">
    <div class="col-sm-12">
      <h5 class="mb-4 font-weight-light">Background Slide Animation</h5>
      <button class="gb gb-bordered hover-slide" id="gb7">Button 7</button>
      <button class="gb gb-bordered hover-slide gb-rounded" id="gb8">Button 8</button>
      <button class="gb gb-bordered hover-slide" id="gb9">Button 9</button>
    </div>
  </div>
  <div class="row mt-5">
    <div class="col-sm-12">
      <h5 class="mb-4 font-weight-light">Background Slide and Fill</h5>
      <button class="gb gb-bordered hover-slide hover-fill" id="gb10">Button 10</button>
      <button class="gb gb-bordered hover-slide hover-fill gb-rounded" id="gb11">Button 11</button>
      <button class="gb gb-bordered hover-slide hover-fill reverse" id="gb12">Button 12</button>
    </div>
  </div>
  <div class="row mt-5 text-center">
    <div class="col-sm-12">
      <div class="font-weight-light">Made by <a href="https://www.thecssking.com/" target="_blank">Jordan</a> with <a href="https://www.gradientmagic.com/" target="_blank">Gradient Magic</a></div>
    </div>
  </div>
<div>
کد CSS:
body {
  background: linear-gradient(90deg, rgba(165, 165, 165, 0.03) 0%, rgba(165, 165, 165, 0.03) 8%,rgba(235, 235, 235, 0.03) 8%, rgba(235, 235, 235, 0.03) 9%,rgba(7, 7, 7, 0.03) 9%, rgba(7, 7, 7, 0.03) 14%,rgba(212, 212, 212, 0.03) 14%, rgba(212, 212, 212, 0.03) 17%,rgba(219, 219, 219, 0.03) 17%, rgba(219, 219, 219, 0.03) 95%,rgba(86, 86, 86, 0.03) 95%, rgba(86, 86, 86, 0.03) 100%),linear-gradient(67.5deg, rgba(80, 80, 80, 0.03) 0%, rgba(80, 80, 80, 0.03) 11%,rgba(138, 138, 138, 0.03) 11%, rgba(138, 138, 138, 0.03) 17%,rgba(122, 122, 122, 0.03) 17%, rgba(122, 122, 122, 0.03) 24%,rgba(166, 166, 166, 0.03) 24%, rgba(166, 166, 166, 0.03) 27%,rgba(245, 245, 245, 0.03) 27%, rgba(245, 245, 245, 0.03) 89%,rgba(88, 88, 88, 0.03) 89%, rgba(88, 88, 88, 0.03) 100%),linear-gradient(67.5deg, rgba(244, 244, 244, 0.03) 0%, rgba(244, 244, 244, 0.03) 4%,rgba(16, 16, 16, 0.03) 4%, rgba(16, 16, 16, 0.03) 10%,rgba(157, 157, 157, 0.03) 10%, rgba(157, 157, 157, 0.03) 20%,rgba(212, 212, 212, 0.03) 20%, rgba(212, 212, 212, 0.03) 83%,rgba(5, 5, 5, 0.03) 83%, rgba(5, 5, 5, 0.03) 84%,rgba(237, 237, 237, 0.03) 84%, rgba(237, 237, 237, 0.03) 100%),linear-gradient(90deg, #FFF,#FFF);
  height: 94vh;
}
.fancy{
    font-family: 'Marcellus SC', serif;
}
.gb {
  padding: 8px 20px;
  margin-right: 25px;
  cursor: pointer;
  font-size: 18px;
  border-radius: 4px;
}
$border-width: 4px;
// Help from 2nd answer in https://stackoverflow.com/questions/5706963/possible-to-use-border-radius-together-with-a-border-image-which-has-a-gradient
.gb-bordered {
  padding: 6px 20px;
  position: relative;
  border: $border-width solid transparent;
  background-clip: padding-box;
  transition: .5s all;
  &:after {
    transition: .5s all;
    position: absolute;
    top: -$border-width;
    left: -$border-width;
    right: -$border-width;
    bottom: -$border-width;
    content: '';
    z-index: -1;
    border-radius: 4px;
  }
}
.gb-rounded {
  border-radius: 50px;
  &.gb-bordered:after {
    border-radius: 50px;
  }
}
.hover-fill {
  transition: .6s all;
  &:hover {
    background-color: transparent;
    color: white;
  }
  &.reverse {
    background-color: transparent;
    color: white;
    &:hover {
      background-color: white;
      color: #333;
    }
  }
}
.hover-slide {
  transition: .6s all;
  &:after {
    background-size: 200% 100%;
    background-position: 0% 0;
  }
  &:hover {
    &:after {
      background-position: 100% 0;
    }
  }
}
#gb1 {
  &:after {
    background-image: linear-gradient(45deg, rgb(107, 41, 176) 0%, rgb(107, 41, 176) 26%,rgb(201, 24, 187) 26%, rgb(201, 24, 187) 45%,rgb(224, 20, 189) 45%, rgb(224, 20, 189) 53%,rgb(83, 45, 173) 53%, rgb(83, 45, 173) 59%,rgb(154, 33, 181) 59%, rgb(154, 33, 181) 62%,rgb(130, 37, 178) 62%, rgb(130, 37, 178) 66%,rgb(177, 28, 184) 66%, rgb(177, 28, 184) 77%,rgb(248, 16, 192) 77%, rgb(248, 16, 192) 100%);
  }
}
#gb2 {
  &:after {
    background-image: linear-gradient(45deg, rgb(11, 45, 126) 0%, rgb(11, 45, 126) 44%,rgb(21, 87, 153) 44%, rgb(21, 87, 153) 45%,rgb(30, 129, 181) 45%, rgb(30, 129, 181) 61%,rgb(40, 170, 208) 61%, rgb(40, 170, 208) 67%,rgb(49, 212, 235) 67%, rgb(49, 212, 235) 100%);
  }
}
#gb3 {
  color: white;
  border: none;
  background: linear-gradient(45deg, rgba(8, 211, 172, 0.45) 0%, rgba(8, 211, 172, 0.45) 12.5%,rgba(62, 29, 50, 0.45) 12.5%, rgba(62, 29, 50, 0.45) 25%,rgba(54, 55, 67, 0.45) 25%, rgba(54, 55, 67, 0.45) 37.5%,rgba(47, 81, 85, 0.45) 37.5%, rgba(47, 81, 85, 0.45) 50%,rgba(23, 159, 137, 0.45) 50%, rgba(23, 159, 137, 0.45) 62.5%,rgba(16, 185, 155, 0.45) 62.5%, rgba(16, 185, 155, 0.45) 75%,rgba(31, 133, 120, 0.45) 75%, rgba(31, 133, 120, 0.45) 87.5%,rgba(39, 107, 102, 0.45) 87.5%, rgba(39, 107, 102, 0.45) 100%),linear-gradient(135deg, rgb(87, 116, 221),rgb(35, 4, 229));
}
#gb4 {
  &:after {
    background: linear-gradient(45deg, rgb(239, 7, 129) 0%, rgb(239, 7, 129) 6%,rgb(208, 10, 112) 6%, rgb(208, 10, 112) 25%,rgb(177, 13, 96) 25%, rgb(177, 13, 96) 40%,rgb(147, 16, 79) 40%, rgb(147, 16, 79) 45%,rgb(116, 19, 62) 45%, rgb(116, 19, 62) 53%,rgb(85, 22, 46) 53%, rgb(85, 22, 46) 66%,rgb(54, 25, 29) 66%, rgb(54, 25, 29) 100%);
  }
}
#gb5 {
   &:after {
    background: linear-gradient(0, rgba(151, 49, 241, 0.46) 0%, rgba(151, 49, 241, 0.46) 6%,rgba(163, 71, 217, 0.46) 6%, rgba(163, 71, 217, 0.46) 33%,rgba(175, 94, 193, 0.46) 33%, rgba(175, 94, 193, 0.46) 47%,rgba(187, 116, 169, 0.46) 47%, rgba(187, 116, 169, 0.46) 65%,rgba(200, 139, 146, 0.46) 65%, rgba(200, 139, 146, 0.46) 77%,rgba(212, 161, 122, 0.46) 77%, rgba(212, 161, 122, 0.46) 87%,rgba(224, 184, 98, 0.46) 87%, rgba(224, 184, 98, 0.46) 97%,rgba(236, 206, 74, 0.46) 97%, rgba(236, 206, 74, 0.46) 100%),linear-gradient(90deg, rgb(233, 14, 27) 0%, rgb(233, 14, 27) 15%,rgb(235, 41, 27) 15%, rgb(235, 41, 27) 39%,rgb(238, 67, 26) 39%, rgb(238, 67, 26) 42%,rgb(240, 94, 26) 42%, rgb(240, 94, 26) 52%,rgb(243, 120, 25) 52%, rgb(243, 120, 25) 61%,rgb(245, 147, 25) 61%, rgb(245, 147, 25) 76%,rgb(248, 173, 24) 76%, rgb(248, 173, 24) 88%,rgb(250, 200, 24) 88%, rgb(250, 200, 24) 100%);
  }
}
#gb6 {
  &:after {
    background: linear-gradient(164deg, rgba(0, 0, 0, 0.08) 0%, rgba(0, 0, 0, 0.08) 50%,rgba(222, 222, 222, 0.08) 50%, rgba(222, 222, 222, 0.08) 100%),linear-gradient(73deg, rgba(182, 182, 182, 0.02) 0%, rgba(182, 182, 182, 0.02) 50%,rgba(216, 216, 216, 0.02) 50%, rgba(216, 216, 216, 0.02) 100%),linear-gradient(215deg, rgba(27, 27, 27, 0.09) 0%, rgba(27, 27, 27, 0.09) 50%,rgba(243, 243, 243, 0.09) 50%, rgba(243, 243, 243, 0.09) 100%),linear-gradient(236deg, rgba(242, 242, 242, 0.05) 0%, rgba(242, 242, 242, 0.05) 50%,rgba(16, 16, 16, 0.05) 50%, rgba(16, 16, 16, 0.05) 100%),linear-gradient(256deg, rgba(170, 170, 170, 0.07) 0%, rgba(170, 170, 170, 0.07) 50%,rgba(209, 209, 209, 0.07) 50%, rgba(209, 209, 209, 0.07) 100%),linear-gradient(126deg, rgba(204, 204, 204, 0.1) 0%, rgba(204, 204, 204, 0.1) 50%,rgba(26, 26, 26, 0.1) 50%, rgba(26, 26, 26, 0.1) 100%),linear-gradient(61deg, rgba(250, 250, 250, 0.01) 0%, rgba(250, 250, 250, 0.01) 50%,rgba(13, 13, 13, 0.01) 50%, rgba(13, 13, 13, 0.01) 100%),linear-gradient(56deg, rgba(210, 210, 210, 0.05) 0%, rgba(210, 210, 210, 0.05) 50%,rgba(79, 79, 79, 0.05) 50%, rgba(79, 79, 79, 0.05) 100%),linear-gradient(226deg, rgba(62, 62, 62, 0.08) 0%, rgba(62, 62, 62, 0.08) 50%,rgba(73, 73, 73, 0.08) 50%, rgba(73, 73, 73, 0.08) 100%),linear-gradient(90deg, rgb(236, 2, 158),rgb(161, 2, 79));
  }
}
#gb7, #gb10 {
  &:after {
    background-image: linear-gradient(135deg, rgb(246, 137, 24) 0%, rgb(246, 137, 24) 31%,rgb(174, 62, 159) 31%, rgb(174, 62, 159) 42%,rgb(210, 100, 92) 42%, rgb(210, 100, 92) 49%,rgb(138, 25, 227) 49%, rgb(138, 25, 227) 100%);
  }
}
#gb8 {
  &:after {
    background-image: linear-gradient(90deg, hsla(357,85%,70%, 1) 0%, hsla(357,85%,70%, 1) 14.3%,hsla(48.42,85%,70%, 1) 14.3%, hsla(48.42,85%,70%, 1) 28.6%,hsla(99.85,85%,70%, 1) 28.6%, hsla(99.85,85%,70%, 1) 42.9%,hsla(151.28,85%,70%, 1) 42.9%, hsla(151.28,85%,70%, 1) 57.2%,hsla(202.71,85%,70%, 1) 57.2%, hsla(202.71,85%,70%, 1) 71.5%,hsla(254.14,85%,70%, 1) 71.5%, hsla(254.14,85%,70%, 1) 85.8%,hsla(305.57,85%,70%, 1) 85.8%, hsla(305.57,85%,70%, 1) 100.1%);
  }
}
#gb9 {
  background-color: transparent;
  color: white;
  &:after {
    background-image: linear-gradient(135deg, rgb(13, 4, 178) 0%, rgb(13, 4, 178) 12.5%,rgb(17, 25, 182) 12.5%, rgb(17, 25, 182) 25%,rgb(20, 46, 185) 25%, rgb(20, 46, 185) 37.5%,rgb(24, 67, 189) 37.5%, rgb(24, 67, 189) 50%,rgb(28, 87, 192) 50%, rgb(28, 87, 192) 62.5%,rgb(32, 108, 196) 62.5%, rgb(32, 108, 196) 75%,rgb(35, 129, 199) 75%, rgb(35, 129, 199) 87.5%,rgb(39, 150, 203) 87.5%, rgb(39, 150, 203) 100%);
  }
  &:hover {
    color: white;
  }
}
#gb11 {
  &:after {
    background-image: linear-gradient(135deg, rgb(138, 229, 83) 0%, rgb(138, 229, 83) 22%,rgb(110, 203, 71) 22%, rgb(110, 203, 71) 28%,rgb(83, 176, 59) 28%, rgb(83, 176, 59) 72%,rgb(55, 150, 47) 72%, rgb(55, 150, 47) 100%);
  }
}
#gb12 {
  &:after {
    background-image: linear-gradient(45deg, rgba(49, 74, 89, 0.45) 0%, rgba(49, 74, 89, 0.45) 12.5%,rgba(122, 86, 72, 0.45) 12.5%, rgba(122, 86, 72, 0.45) 25%,rgba(170, 94, 60, 0.45) 25%, rgba(170, 94, 60, 0.45) 37.5%,rgba(219, 102, 49, 0.45) 37.5%, rgba(219, 102, 49, 0.45) 50%,rgba(146, 90, 66, 0.45) 50%, rgba(146, 90, 66, 0.45) 62.5%,rgba(98, 82, 78, 0.45) 62.5%, rgba(98, 82, 78, 0.45) 75%,rgba(195, 98, 55, 0.45) 75%, rgba(195, 98, 55, 0.45) 87.5%,rgba(73, 78, 83, 0.45) 87.5%, rgba(73, 78, 83, 0.45) 100%),linear-gradient(135deg, rgb(117, 6, 152),rgb(110, 34, 251));
  }
}
دکمه ی حذف
تا اینجا تمامی دکمه هایی که معرفی کردیم، با تعریف استایل مناسب قابل طراحی بودند؛ اما برای دکمههای حذف، ارسال، تایید، دانلود و آپلود، نیاز به کد جاوا اسکریپت داریم تا بعد از انجام این عملیاتها در سمت سرور، افکت مربوط به دکمه اجرا شود.در این بخش از مقاله ی آموزش ساخت دکمه با HTML به آموزش ساخت دکمه حذف با CSS میپردازیم. برای طراحی دکمه ی حذف ابتدا در Html آیکونهای قبل و بعد را در دکمه قرار میدهیم:
<a class="button" href="#" role="button">
	<span>remove</span>
	<div class="icon">
		<i class="fa fa-remove"></i>
		<i class="fa fa-check"></i>
	</div>
</a>
سپس در کد CSS مینویسیم:
/* Reset */
@import url(//codepen.io/chrisdothtml/pen/ojLzJK.css);
// Variables
$color: #c0392b;
$color-dark: #a53125;
$speed: "0.25s";
$transition: all #{$speed} cubic-bezier(0.310, -0.105, 0.430, 1.400);
/* Main Styles */
.button {
	display: block;
	background-color: $color;
	width: 300px;
	height: 100px;
	line-height: 100px;
	margin: auto;
	color: #fff;
	position: absolute;
	top: 0;
	bottom: 0;
	left: 0;
	right: 0;
	cursor: pointer;
	overflow: hidden;
	border-radius: 5px;
	box-shadow: 0 0 20px 0 rgba(0,0,0,.3);
	transition: $transition;
	span,
	.icon {
		display: block;
		height: 100%;
		text-align: center;
		position: absolute;
		top: 0;
	}
	span {
		width: 72%;
		line-height: inherit;
		font-size: 22px;
		text-transform: uppercase;
		left: 0;
		transition: $transition;
		&:after {
			content: '';
			background-color: $color-dark;
			width: 2px;
			height: 70%;
			position: absolute;
			top: 15%;
			right: -1px;
		}
	}
	.icon {
		width: 28%;
		right: 0;
		transition: $transition;
		.fa {
			font-size: 30px;
			vertical-align: middle;
			transition: $transition, height #{$speed} ease;
		}
		.fa-remove {
			height: 36px;
		}
		.fa-check {
			display: none;
		}
	}
	&.success,
	&:hover {
		span {
			left: -72%;
			opacity: 0;
		}
		.icon {
			width: 100%;
			.fa {
				font-size: 45px;
			}
		}
	}
	&.success {
		background-color: #27ae60;
		.icon {
			.fa-remove {
				display: none;
			}
			.fa-check {
				display: inline-block;
			}
		}
	}
	&:hover {
		opacity: .9;
		.icon .fa-remove {
			height: 46px;
		}
	}
	&:active {
		opacity: 1;
	}
}
کد جاوا اسکریپت را اضافه میکنیم تا بعد از انجام عملیات حذف المان، دکمه را از لحاظ ظاهری تغییر داده و آن را سبز کند:
removeSuccess = ->
	$('.button').removeClass 'success'
$(document).ready ->
	$('.button').click ->
		$(@).addClass 'success'
		setTimeout removeSuccess, 3000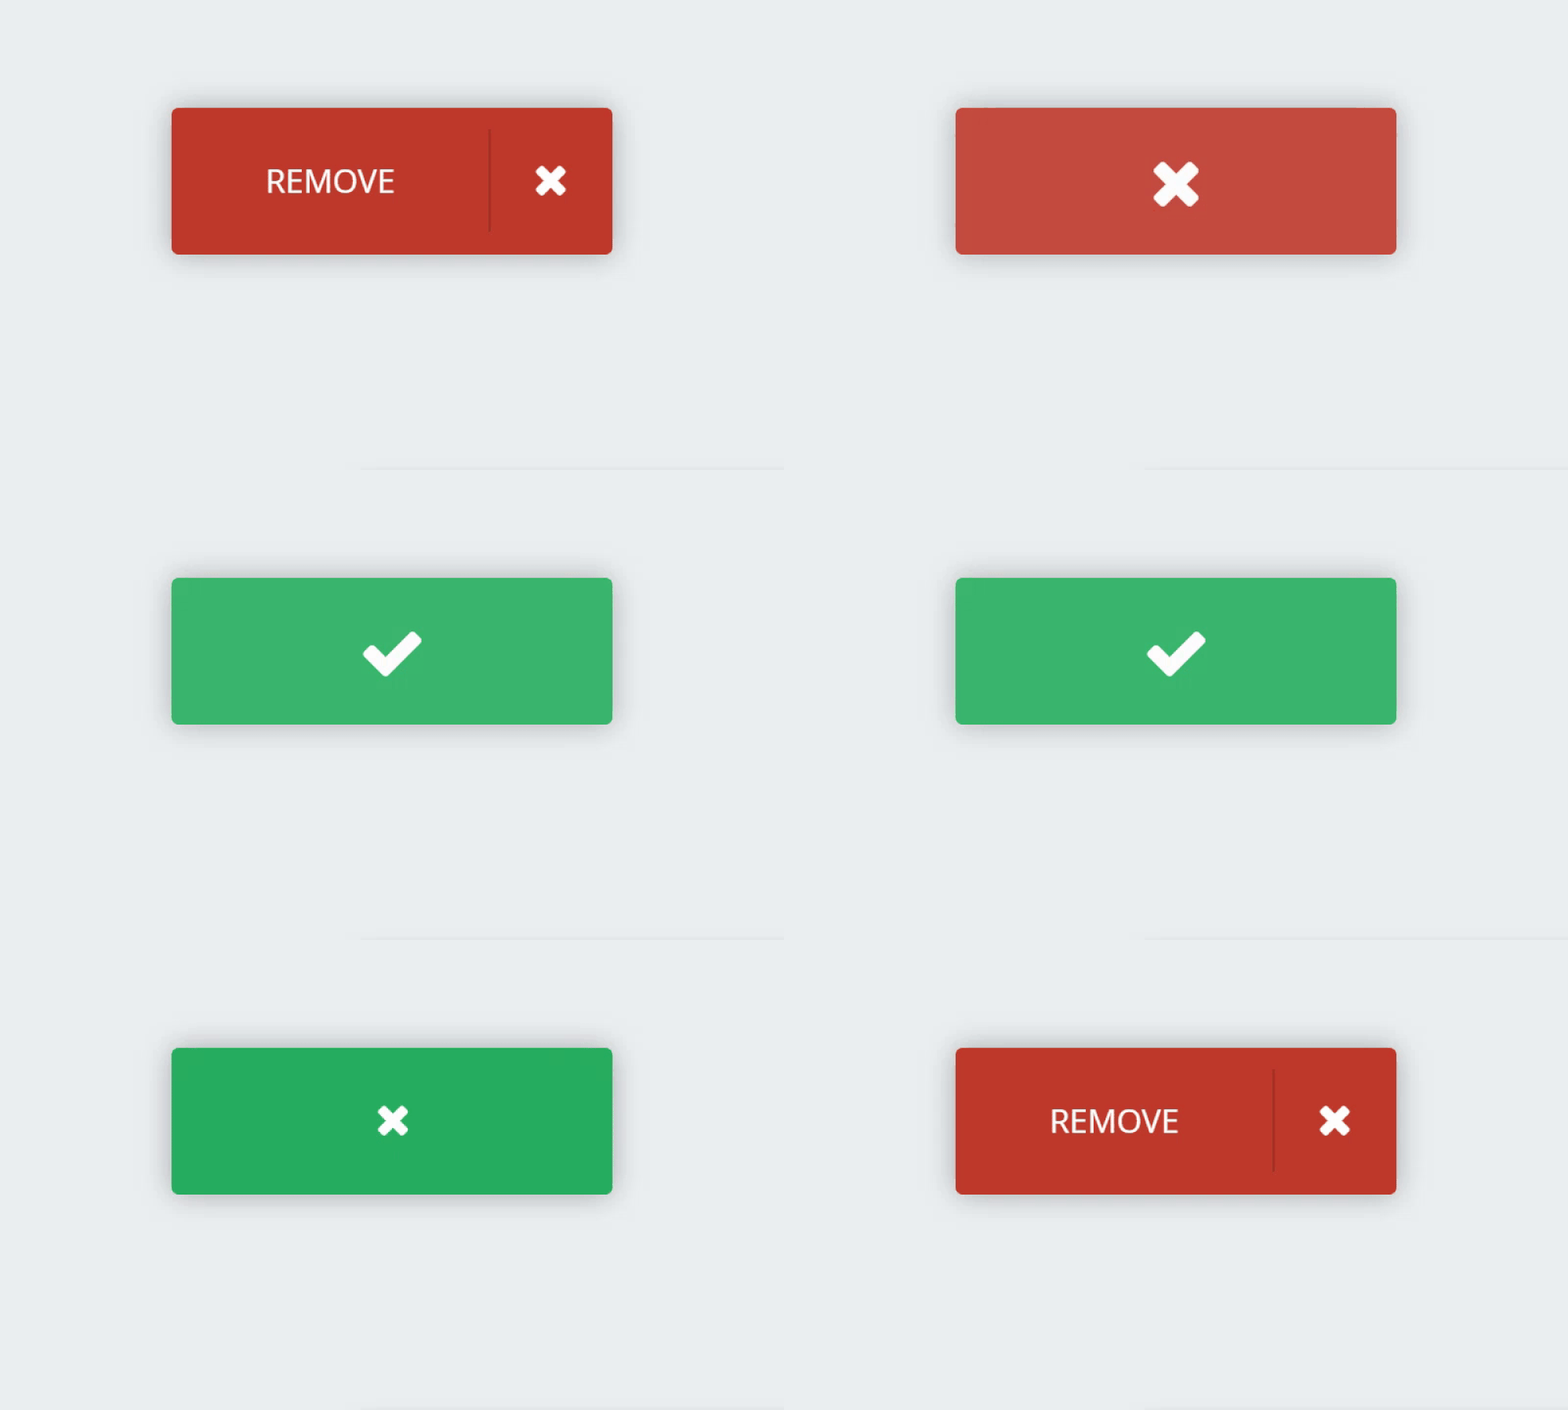
دکمه ی ارسال
در این بخش از مقاله ی آموزش ساخت دکمه با HTML به آموزش ساخت دکمههای زیبا ارسال با CSS میپردازیم.
می خواهیم دکمه ی ارسالی طراحی کنیم تا بعد از کلیک روی آن، دایره ای به عنوان لودینگ دورش بچرخد و بعد از اتمام ارسال، دکمه تیک بخورد. (البته توجه داشته باشید که یک المان ریست هم برای اجرای دوباره طراحی کرده ایم.)
کد Html:
<button class="button">
    <span>Submit</span>
    <svg viewBox="0 0 15 13">
        <polyline points="2 6.5 6 10.5 13 2.5"></polyline>
    </svg>
</button>
<a href="" class="restart">
    <svg viewBox="0 0 16 16" fill="currentColor">
        <path d="M4.5,4.5c1.9-1.9,5.1-1.9,7,0c0.7,0.7,1.2,1.7,1.4,2.7l2-0.3C14.7,5.4,14,4.1,13,3.1c-2.7-2.7-7.1-2.7-9.9,0 L0.9,0.9L0.2,7.3l6.4-0.7L4.5,4.5z"></path>
        <path d="M15.8,8.7L9.4,9.4l2.1,2.1c-1.9,1.9-5.1,1.9-7,0c-0.7-0.7-1.2-1.7-1.4-2.7l-2,0.3 C1.3,10.6,2,11.9,3,12.9c1.4,1.4,3.1,2,4.9,2c1.8,0,3.6-0.7,4.9-2l2.2,2.2L15.8,8.7z"></path>
    </svg>
    Restart
</a>
کد CSS:
.button-hold {
    --color: #F6F8FF;
    --background: #2B3044;
    --icon: var(--color);
    --progress-border: #646B8C;
    --progress-active: #fff;
    --progress-success: #5C86FF;
    --tick-stroke: var(--progress-active);
    --shadow: #{rgba(#00093D, .2)};
    font-size: 16px;
    font-weight: 500;
    line-height: 19px;
    min-width: 112px;
    padding: 12px 20px 12px 12px;
    border: 0;
    border-radius: 24px;
    outline: none;
    user-select: none;
    cursor: pointer;
    -webkit-backface-visibility: hidden;
    -webkit-appearance: none;
    transition: transform .3s, box-shadow .3s;
    box-shadow: 0 var(--shadow-y, 4px) var(--shadow-blur, 12px) var(--shadow);
    transform: scale(var(--scale, 1)) translateZ(0);
    color: var(--color);
    background: var(--background);
    & > div {
        margin-right: 4px;
        border-radius: 50%;
        display: inline-block;
        vertical-align: top;
        position: relative;
        background: var(--progress-border);
        &:before {
            content: '';
            width: 16px;
            height: 16px;
            left: 2px;
            top: 2px;
            z-index: 1;
            position: absolute;
            background: var(--background);
            border-radius: inherit;
            transform: scale(var(--background-scale, 1));
            transition: transform .32s ease;
        }
        svg {
            display: block;
            &.icon,
            &.tick {
                position: absolute;
            }
            &.icon {
                width: 8px;
                height: 8px;
                left: 6px;
                top: 6px;
                fill: var(--icon);
                z-index: 1;
                transition: opacity .2s, transform .2s;
                opacity: var(--icon-opacity, 1);
                transform: translateY(var(--icon-y, 0)) scale(var(--icon-scale, 1));
            }
            &.progress,
            &.tick {
                fill: none;
            }
            &.progress {
                width: 20px;
                height: 20px;
                transform: rotate(-90deg) scale(var(--progress-scale, 1));
                transition: transform .5s ease;
                circle {
                    stroke-dashoffset: 1;
                    stroke-dasharray: var(--progress-array, 0) 52;
                    stroke-width: 16;
                    stroke: var(--progress-active);
                    transition: stroke-dasharray var(--duration) linear;
                }
            }
            &.tick {
                width: 20px;
                height: 20px;
                left: 0;
                top: 0;
                stroke-width: 3;
                stroke-linecap: round;
                stroke-linejoin: round;
                stroke: var(--tick-stroke);
                transition: stroke .3s ease .7s;
                polyline {
                    stroke-dasharray: 18 18 18;
                    stroke-dashoffset: var(--tick-offset, 18);
                    transition: stroke-dashoffset .4s ease .7s;
                }
            }
        }
    }
    &:focus,
    &:hover {
        &:not(.process) {
            --shadow-y: 8px;
            --shadow-blur: 16px;
        }
    }
    &:active {
        &:not(.success) {
            --scale: .96;
            --shadow-y: 4px;
            --shadow-blur: 8px;
        }
    }
    &.process,
    &.success {
        --progress-array: 52;
        --icon-y: -4px;
        --icon-scale: .6;
        --icon-opacity: 0;
    }
    &.success {
        --progress-border: none;
        --progress-scale: .11;
        --tick-stroke: var(--progress-success);
        --background-scale: 0;
        --tick-offset: 36;
        & > div {
            svg {
                &.progress {
                    animation: tick .3s linear forwards .4s;
                }
            }
        }
    }
}
@keyframes tick {
    100% {
        transform: rotate(-90deg) translate(0, -5px) scale(var(--progress-scale));
    }
}
html {
    box-sizing: border-box;
    -webkit-font-smoothing: antialiased;
}
* {
    box-sizing: inherit;
    &:before,
    &:after {
        box-sizing: inherit;
    }
}
// Center & dribbble
body {
    min-height: 100vh;
    display: flex;
    font-family: 'Roboto', Arial;
    justify-content: center;
    align-items: center;
    background: #ECEFFC;
    .dribbble {
        position: fixed;
        display: block;
        right: 20px;
        bottom: 20px;
        img {
            display: block;
            height: 28px;
        }
    }
    .twitter {
        position: fixed;
        display: block;
        right: 64px;
        bottom: 14px;
        svg {
            width: 32px;
            height: 32px;
            fill: #1da1f2;
        }
    }
}
کد جاوا اسکریپت:
// Hold button with mouse / select with tab and hold spacebar
let duration = 1600,
    success = button => {
        //Success function
        button.classList.add('success');
    };
document.querySelectorAll('.button-hold').forEach(button => {
    button.style.setProperty('--duration', duration + 'ms');
    ['mousedown', 'touchstart', 'keypress'].forEach(e => {
        button.addEventListener(e, ev => {
            if(e != 'keypress' || (e == 'keypress' && ev.which == 32 && !button.classList.contains('process'))) {
                button.classList.add('process');
                button.timeout = setTimeout(success, duration, button);
            }
        });
    });
    ['mouseup', 'mouseout', 'touchend', 'keyup'].forEach(e => {
        button.addEventListener(e, ev => {
            if(e != 'keyup' || (e == 'keyup' && ev.which == 32)) {
                button.classList.remove('process');
                clearTimeout(button.timeout);
            }
        }, false);
    });
});
دکمه ی دانلود
در این بخش از مقاله ی آموزش ساخت دکمه با HTML به آموزش ساخت دکمههای زیبا دانلود با CSS میپردازیم.
می خواهیم یک دکمه ی دانلود را به گونه ای طراحی کنیم تا بعد از کلیک روی آن، نواری در پایین دکمه به عنوان لودینگ پر شود و بعد از اتمام دانلود، دکمه بالا و پایین بپرد.
کد Html:
a.btn(href='#')
  span.circle
  svg(width='20' height='26' viewbox='0 0 20 26')
    path(d='M1.5 16.5L10 24.5L18.5 16.5')
    path(d='M10 1.5V24')
  span.progress
کد CSS:
$primary: #ff9b8b
$secondary: #fdd7d2
body
  min-height: 100vh
  display: flex
  justify-content: center
  align-items: center
  background: #4e295b
*
  box-sizing: border-box
.btn
  position: relative
  display: inline-block
  width: 48px
  height: 48px
  border-radius: 24px
  svg
    fill: none
    width: 20px
    height: 26px
    margin: 11px 0 0 14px
    transform: translate3d(0,0,0)
    path
      stroke: $secondary
      stroke-width: 3
      stroke-linecap: round
      stroke-linejoin: round
      transition: stroke .3s ease
  .circle
    position: absolute
    display: block
    top: 0
    left: 0
    height: 48px
    width: 48px
    border-radius: 24px
    border: 3px solid $secondary
    transition: border .3s ease
  .progress
    position: absolute
    display: block
    bottom: -10px
    left: 0
    height: 3px
    width: 48px
    border-radius: 3px
    background: rgba($secondary,.2)
    opacity: 0
    pointer-events: none
    overflow: hidden
    &:after
      content: ''
      display: block
      width: 100%
      height: 3px
      border-radius: 2px
      background: $primary
      transform-origin: left
      transform: scaleX(0)
      transition: transform 2s linear
    &.active
      opacity: 1
      &::after
        transform: scaleX(1)
  &:hover
    .circle
      border-color: $primary
    svg
      path
        stroke: $primary
  &:active
    svg
      transform: translateY(2px)
  &.pending
    .circle
      border-color: $primary
      animation: animC .6s ease-out
      animation-delay: 2.35s
    svg
      animation: animS .6s ease-in
      animation-delay: 2.15s
      path
        stroke: $primary
@keyframes animS
    5%
      transform: scale(.9)
    50%
      transform: translateY(12px)
    80%
      transform: translateY(-4px)
@keyframes animC
    50%
      transform: translateY(6px)
    80%
      transform: translateY(-4px)
کد جاوا اسکریپت:
$('.btn').click ->
  $('.btn').addClass 'pending'
  $('.progress').addClass 'active'
  setTimeout (->
    $('.progress').removeClass 'active'
  ), 2300
  setTimeout (->
    $('.btn').removeClass 'pending'
  ), 3600
دکمه ی آپلود
در این بخش از مقاله ی آموزش ساخت دکمه با HTML به آموزش ساخت دکمههای زیبا آپلود با CSS میپردازیم. کد Html:
<div class="container">
    <a href="" class="button">
        <ul>
            <li>Upload</li>
            <li>Uploading</li>
            <li>Uploaded</li>
        </ul>
        <div>
            <svg viewBox="0 0 24 24"></svg>
        </div>
    </a>
    <a href="" class="button dark-single">
        <div>
            <svg viewBox="0 0 24 24"></svg>
        </div>
    </a>
    <div></div>
    <a href="" class="button white-single">
        <div>
            <svg viewBox="0 0 24 24"></svg>
        </div>
    </a>
    <a href="" class="button dark">
        <ul>
            <li>Upload</li>
            <li>Uploading</li>
            <li>Uploaded</li>
        </ul>
        <div>
            <svg viewBox="0 0 24 24"></svg>
        </div>
    </a>
</div>
کد CSS:
.button {
    &.dark-single {
        --background: none;
        --rectangle: #242836;
        --success: #4BC793;
    }
    &.white-single {
        --background: none;
        --rectangle: #F5F9FF;
        --arrow: #275efe;
        --success: #275efe;
        --shadow: rgba(10, 22, 50, .1);
    }
    &.dark {
        --background: #242836;
        --rectangle: #1C212E;
        --arrow: #F5F9FF;
        --text: #F5F9FF;
        --success: #2F3545;
    }
}
.button {
    --background: #275efe;
    --rectangle: #184fee;
    --success: #{mix(white, #184fee, 20%)};
    --text: #fff;
    --arrow: #fff;
    --checkmark: #fff;
    --shadow: rgba(10, 22, 50, .24);
    display: flex;
    overflow: hidden;
    text-decoration: none;
    -webkit-mask-image: -webkit-radial-gradient(white, black);
    background: var(--background);
    border-radius: 30px;
    box-shadow: 0 2px 8px -1px var(--shadow);
    transition: transform .2s ease, box-shadow .2s ease;
    &:active {
        transform: scale(.95);
        box-shadow: 0 1px 4px -1px var(--shadow);
    }
    ul {
        margin: 0;
        padding: 16px 32px 16px 44px;
        list-style: none;
        text-align: center;
        position: relative;
        backface-visibility: hidden;
        font-size: 16px;
        font-weight: 500;
        line-height: 28px;
        color: var(--text);
        li {
            &:not(:first-child) {
                top: 16px;
                left: 4px;
                right: 0;
                position: absolute;
            }
            &:nth-child(2) {
                top: 76px;
            }
            &:nth-child(3) {
                top: 136px;
            }
        }
    }
    & > div {
        overflow: hidden;
        -webkit-mask-image: -webkit-radial-gradient(white, black);
        position: relative;
        width: 60px;
        height: 60px;
        border-radius: 30px;
        background: var(--rectangle);
        &:before,
        &:after {
            content: '';
            display: block;
            position: absolute;
        }
        &:before {
            border-radius: 1px;
            width: 2px;
            top: 50%;
            left: 50%;
            height: 17px;
            margin: -8px 0 0 -1px;
            background: var(--arrow);
        }
        &:after {
            width: 60px;
            height: 60px;
            transform-origin: 50% 100%;
            border-radius: 80% 80% 0 0;
            background: var(--success);
            top: 0;
            left: 0;
            transform: scaleY(0);
        }
        svg {
            display: block;
            position: absolute;
            width: 20px;
            height: 20px;
            left: 50%;
            top: 50%;
            margin: -12px 0 0 -10px;
            fill: none;
            z-index: 1;
            stroke-width: 2px;
            stroke: var(--arrow);
            stroke-linecap: round;
            stroke-linejoin: round;
        }
    }
    &.loading {
        ul {
            animation: text calc(var(--duration) * 1ms) linear forwards calc(var(--duration) * .065ms);
        }
        & > div {
            &:before {
                animation: line calc(var(--duration) * 1ms) linear forwards calc(var(--duration) * .065ms);
            }
            &:after {
                animation: background calc(var(--duration) * 1ms) linear forwards calc(var(--duration) * .065ms);
            }
            svg {
                animation: svg calc(var(--duration) * 1ms) linear forwards calc(var(--duration) * .065ms);
            }
        }
    }
}
@keyframes text {
    10%,
    85% {
        transform: translateY(-100%);
    }
    95%,
    100% {
        transform: translateY(-200%);
    }
}
@keyframes line {
    5%,
    10% {
        transform: translateY(30px);
    }
    40% {
        transform: translateY(20px);
    }
    65% {
        transform: translateY(0);
    }
    75%,
    100% {
        transform: translateY(-30px);
    }
}
@keyframes svg {
    0%,
    20% {
        stroke-dasharray: 0;
        stroke-dashoffset: 0;
        margin: -12px 0 0 -10px;
    }
    21%,
    89% {
        stroke-dasharray: 26px;
        stroke-dashoffset: 26px;
        stroke-width: 3px;
        margin: -10px 0 0 -10px;
        stroke: var(--checkmark);
    }
    100% {
        stroke-dasharray: 26px;
        stroke-dashoffset: 0;
        margin: -10px 0 0 -10px;
        stroke: var(--checkmark);
    }
    12% {
        opacity: 1;
    }
    20%,
    89% {
        opacity: 0;
    }
    90%,
    100% {
        opacity: 1;
    }
}
@keyframes background {
    10% {
        transform: scaleY(0);
    }
    40% {
        transform: scaleY(.15);
    }
    65% {
        transform: scaleY(.5);
        border-radius: 50% 50% 0 0;
    }
    75% {
        border-radius: 50% 50% 0 0;
    }
    90%,
    100% {
        border-radius: 0;
    }
    75%,
    100% {
        transform: scaleY(1);
    }
}
html {
    box-sizing: border-box;
    -webkit-font-smoothing: antialiased;
}
* {
    box-sizing: inherit;
    &:before,
    &:after {
        box-sizing: inherit;
    }
}
// Center & dribbble
body {
    min-height: 100vh;
    display: flex;
    font-family: 'Roboto', Arial;
    justify-content: center;
    align-items: center;
    flex-direction: column;
    background: #E4ECFA;
    .container {
        display: flex;
        flex-wrap: wrap;
        justify-content: center;
        & > div {
            flex-basis: 100%;
            width: 0;
        }
        .button {
            margin: 16px;
        }
    }
    .dribbble {
        position: fixed;
        display: block;
        right: 20px;
        bottom: 20px;
        img {
            display: block;
            height: 28px;
        }
    }
    .twitter {
        position: fixed;
        display: block;
        right: 64px;
        bottom: 14px;
        svg {
            width: 32px;
            height: 32px;
            fill: #1da1f2;
        }
    }
}
کد جاوا اسکریپت:
const $ = (s, o = document) => o.querySelector(s);
const $$ = (s, o = document) => o.querySelectorAll(s);
let duration = 3000;
$$('.button').forEach(button => {
    let svg = $('svg', button),
        svgPath = new Proxy({
            y: null,
            smoothing: null
        }, {
            set(target, key, value) {
                target[key] = value;
                if(target.y !== null && target.smoothing !== null) {
                    svg.innerHTML = getPath(target.y, target.smoothing, null);
                }
                return true;
            },
            get(target, key) {
                return target[key];
            }
        });
    button.style.setProperty('--duration', duration);
    svgPath.y = 4;
    svgPath.smoothing = 0;
    button.addEventListener('click', e => {
        if(!button.classList.contains('loading')) {
            button.classList.add('loading');
            gsap.to(svgPath, {
                smoothing: .3,
                duration: duration * .065 / 1000
            });
            gsap.to(svgPath, {
                y: 12,
                ease: Elastic.easeOut.config(1.12, .4),
                duration: duration * .265 / 1000,
                delay: duration * .065 / 1000
            });
            setTimeout(() => {
                svg.innerHTML = getPath(0, 0, [
                    [3, 14],
                    [8, 19],
                    [21, 6]
                ]);
            }, (duration / 2));
        }
        e.preventDefault();
    });
});
function getPoint(point, i, a, smoothing) {
    let cp = (current, previous, next, reverse) => {
            let p = previous || current,
                n = next || current,
                o = {
                    length: Math.sqrt(Math.pow(n[0] - p[0], 2) + Math.pow(n[1] - p[1], 2)),
                    angle: Math.atan2(n[1] - p[1], n[0] - p[0])
                },
                angle = o.angle + (reverse ? Math.PI : 0),
                length = o.length * smoothing;
            return [current[0] + Math.cos(angle) * length, current[1] + Math.sin(angle) * length];
        },
        cps = cp(a[i - 1], a[i - 2], point, false),
        cpe = cp(point, a[i - 1], a[i + 1], true);
    return `C ${cps[0]},${cps[1]} ${cpe[0]},${cpe[1]} ${point[0]},${point[1]}`;
}
function getPath(update, smoothing, pointsNew) {
    let points = pointsNew ? pointsNew : [
            [5, 12],
            [12, update],
            [19, 12]
        ],
        d = points.reduce((acc, point, i, a) => i === 0 ? `M ${point[0]},${point[1]}` : `${acc} ${getPoint(point, i, a, smoothing)}`, '');
    return `<path d="${d}" />`;
}
دکمه ی تایید
در بخش پایانی مقاله ی آموزش ساخت دکمه با HTML به آموزش ساخت دکمههای زیبا تایید با CSS میپردازیم. در بسیاری از عملیاتها نیاز هست تا کاربر به میزان مشخصی دکمه را نگه دارد یا به اصطلاح hold کند تا عملیات انجام شود. در اینجا میتوان دکمه را به گونه ای طراحی کرد تا میزان زمان باقی مانده برای نگه داشتن دکمه، با یک نوار لودینگ در خود دکمه مشخص شود و بعد از انجام عملیات، تیک بخورد.
کد Html:
<button class="button-hold">
    <div>
        <svg class="icon" viewBox="0 0 16 16">
            <polygon points="1.3,6.7 2.7,8.1 7,3.8 7,16 9,16 9,3.8 13.3,8.1 14.7,6.7 8,0"></polygon>
        </svg>
        <svg class="progress" viewBox="0 0 32 32">
            <circle r="8" cx="16" cy="16" />
        </svg>
        <svg class="tick" viewBox="0 0 24 24">
            <polyline points="18,7 11,16 6,12" />
        </svg>
    </div>
    Publish
</button>
کد CSS:
.button-hold {
    --color: #F6F8FF;
    --background: #2B3044;
    --icon: var(--color);
    --progress-border: #646B8C;
    --progress-active: #fff;
    --progress-success: #5C86FF;
    --tick-stroke: var(--progress-active);
    --shadow: #{rgba(#00093D, .2)};
    font-size: 16px;
    font-weight: 500;
    line-height: 19px;
    min-width: 112px;
    padding: 12px 20px 12px 12px;
    border: 0;
    border-radius: 24px;
    outline: none;
    user-select: none;
    cursor: pointer;
    -webkit-backface-visibility: hidden;
    -webkit-appearance: none;
    transition: transform .3s, box-shadow .3s;
    box-shadow: 0 var(--shadow-y, 4px) var(--shadow-blur, 12px) var(--shadow);
    transform: scale(var(--scale, 1)) translateZ(0);
    color: var(--color);
    background: var(--background);
    & > div {
        margin-right: 4px;
        border-radius: 50%;
        display: inline-block;
        vertical-align: top;
        position: relative;
        background: var(--progress-border);
        &:before {
            content: '';
            width: 16px;
            height: 16px;
            left: 2px;
            top: 2px;
            z-index: 1;
            position: absolute;
            background: var(--background);
            border-radius: inherit;
            transform: scale(var(--background-scale, 1));
            transition: transform .32s ease;
        }
        svg {
            display: block;
            &.icon,
            &.tick {
                position: absolute;
            }
            &.icon {
                width: 8px;
                height: 8px;
                left: 6px;
                top: 6px;
                fill: var(--icon);
                z-index: 1;
                transition: opacity .2s, transform .2s;
                opacity: var(--icon-opacity, 1);
                transform: translateY(var(--icon-y, 0)) scale(var(--icon-scale, 1));
            }
            &.progress,
            &.tick {
                fill: none;
            }
            &.progress {
                width: 20px;
                height: 20px;
                transform: rotate(-90deg) scale(var(--progress-scale, 1));
                transition: transform .5s ease;
                circle {
                    stroke-dashoffset: 1;
                    stroke-dasharray: var(--progress-array, 0) 52;
                    stroke-width: 16;
                    stroke: var(--progress-active);
                    transition: stroke-dasharray var(--duration) linear;
                }
            }
            &.tick {
                width: 20px;
                height: 20px;
                left: 0;
                top: 0;
                stroke-width: 3;
                stroke-linecap: round;
                stroke-linejoin: round;
                stroke: var(--tick-stroke);
                transition: stroke .3s ease .7s;
                polyline {
                    stroke-dasharray: 18 18 18;
                    stroke-dashoffset: var(--tick-offset, 18);
                    transition: stroke-dashoffset .4s ease .7s;
                }
            }
        }
    }
    &:focus,
    &:hover {
        &:not(.process) {
            --shadow-y: 8px;
            --shadow-blur: 16px;
        }
    }
    &:active {
        &:not(.success) {
            --scale: .96;
            --shadow-y: 4px;
            --shadow-blur: 8px;
        }
    }
    &.process,
    &.success {
        --progress-array: 52;
        --icon-y: -4px;
        --icon-scale: .6;
        --icon-opacity: 0;
    }
    &.success {
        --progress-border: none;
        --progress-scale: .11;
        --tick-stroke: var(--progress-success);
        --background-scale: 0;
        --tick-offset: 36;
        & > div {
            svg {
                &.progress {
                    animation: tick .3s linear forwards .4s;
                }
            }
        }
    }
}
@keyframes tick {
    100% {
        transform: rotate(-90deg) translate(0, -5px) scale(var(--progress-scale));
    }
}
html {
    box-sizing: border-box;
    -webkit-font-smoothing: antialiased;
}
* {
    box-sizing: inherit;
    &:before,
    &:after {
        box-sizing: inherit;
    }
}
// Center & dribbble
body {
    min-height: 100vh;
    display: flex;
    font-family: 'Roboto', Arial;
    justify-content: center;
    align-items: center;
    background: #ECEFFC;
    .dribbble {
        position: fixed;
        display: block;
        right: 20px;
        bottom: 20px;
        img {
            display: block;
            height: 28px;
        }
    }
    .twitter {
        position: fixed;
        display: block;
        right: 64px;
        bottom: 14px;
        svg {
            width: 32px;
            height: 32px;
            fill: #1da1f2;
        }
    }
}
کد جاوا اسکریپت:
// Hold button with mouse / select with tab and hold spacebar
let duration = 1600,
    success = button => {
        //Success function
        button.classList.add('success');
    };
document.querySelectorAll('.button-hold').forEach(button => {
    button.style.setProperty('--duration', duration + 'ms');
    ['mousedown', 'touchstart', 'keypress'].forEach(e => {
        button.addEventListener(e, ev => {
            if(e != 'keypress' || (e == 'keypress' && ev.which == 32 && !button.classList.contains('process'))) {
                button.classList.add('process');
                button.timeout = setTimeout(success, duration, button);
            }
        });
    });
    ['mouseup', 'mouseout', 'touchend', 'keyup'].forEach(e => {
        button.addEventListener(e, ev => {
            if(e != 'keyup' || (e == 'keyup' && ev.which == 32)) {
                button.classList.remove('process');
                clearTimeout(button.timeout);
            }
        }, false);
    });
});
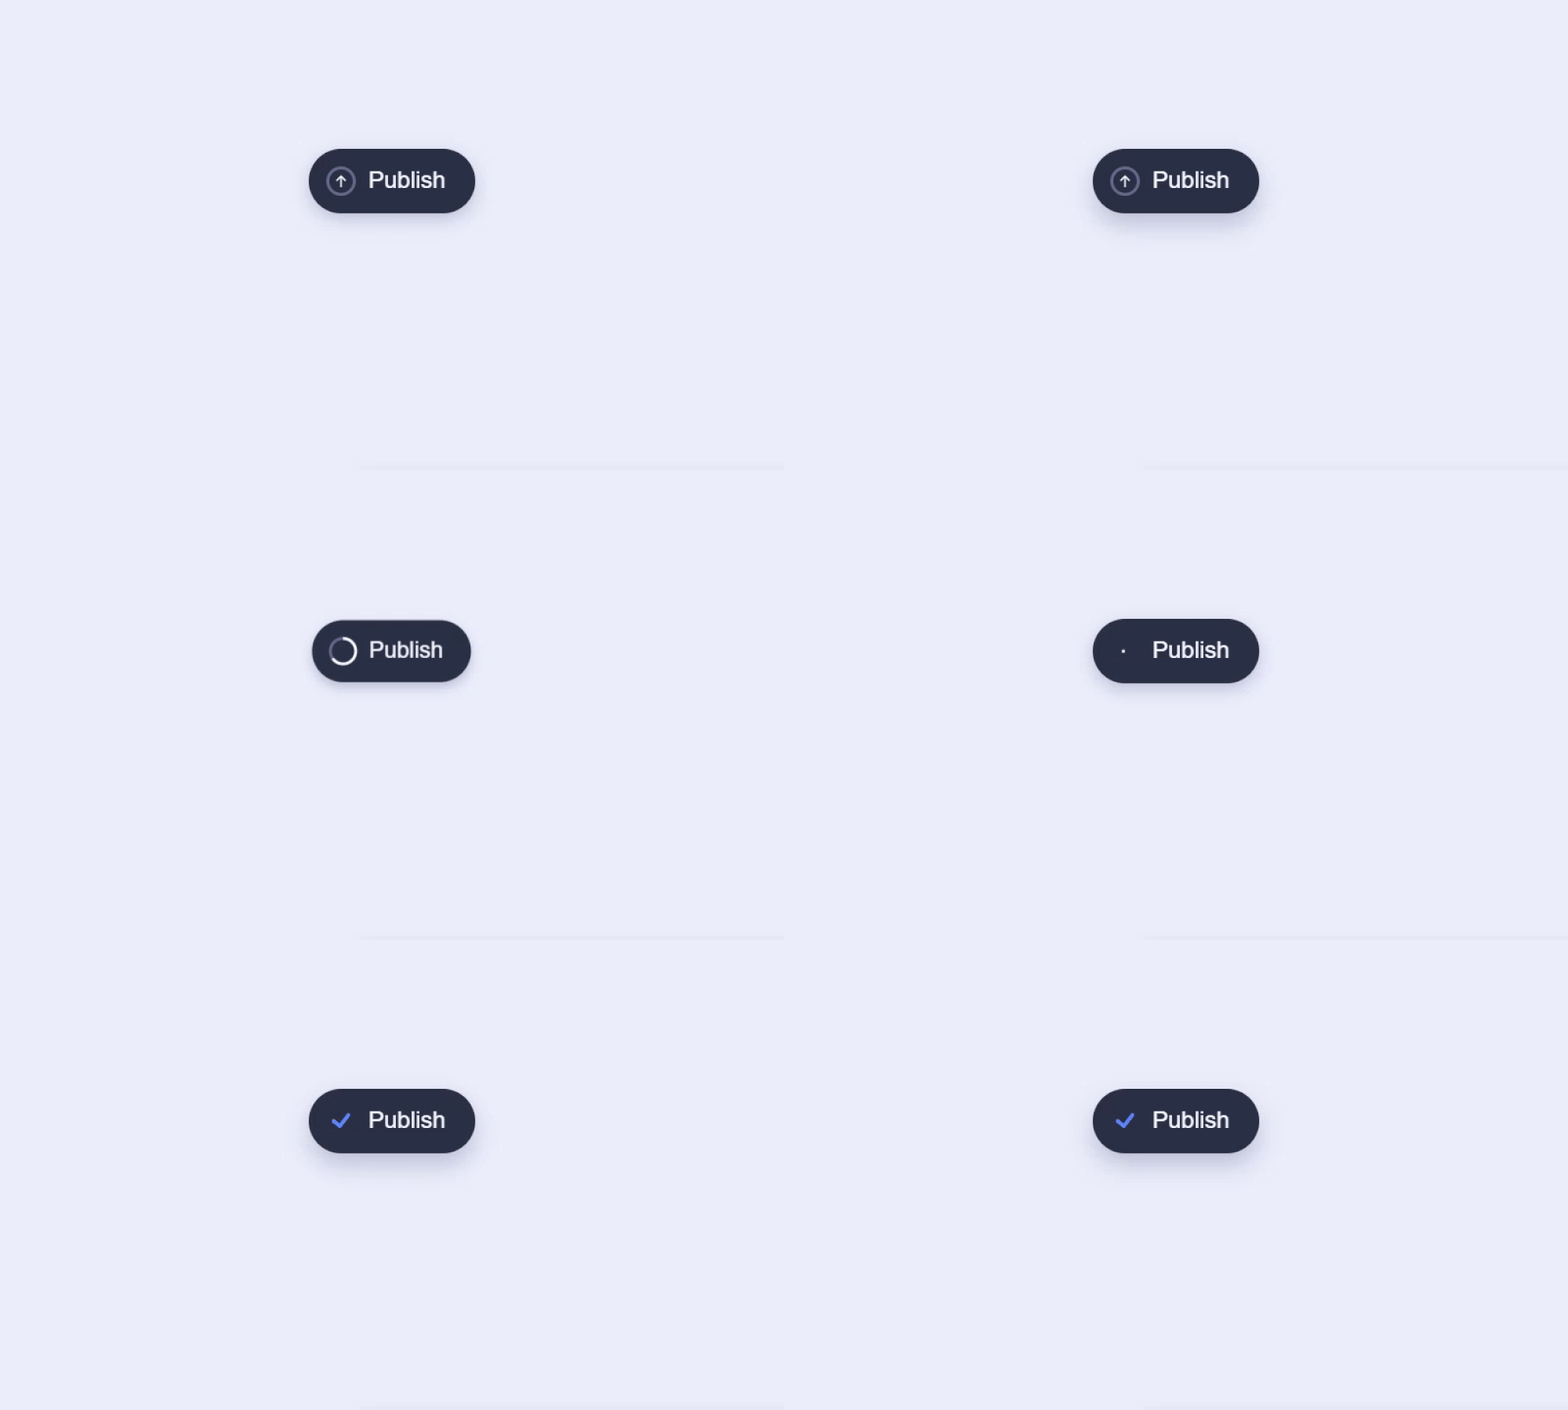
جمع بندی:
دکمهها یکی از مهمترین اجزای طراحی وب و از عناصر حیاتی در وب و برنامههای کاربردی هستند. آنها به کاربران کمک میکنند تا بهتر با رابط کاربری ارتباط برقرار کنند. بنابراین مهم است که دکمهها را با توجه به جزییاتی مانند ظاهر، اندازه، افکتهای مناسب و قابلیت دسترسی در نظر گرفت. بسته به سبک و هدف سایت، طراحیهای زیادی از این که یک دکمه چگونه به نظر میرسد وجود دارد. در این مقاله سعی کردیم تا چند نوع طراحی متداول برای دکمهها را بررسی کنیم تا در نهایت قادر شوید با الهام گیری از این طراحی ها، دید مناسبی برای زیبایی و جذابیت سایت یا برنامه ی خود پیدا کنید.
اگر به یادگیری بیشتر در زمینه HTML , CSS و طراحی وب علاقه مند هستی با شرکت در دوره آموزش طراحی وب ، در کمتر از یکسال به یک طراح وب همه فن حریف تبدیل میشوی که آماده ی استخدام ، دریافت پروژه و کسب درآمد هستی.
درود متن خطا رو بفرستید.
سلام و روزبخیر ببخشید من میخوام روی دکمههای منو هاوری مانند دکمههای منوی این وب سایت داشته باشم چطور این کار را انجام بدم؟ https://hangerclinic...com/
درود منظورتون اون منوی بالاست یا این بخش که شامل Request an Appointment میشه؟
سلام خیلی عالی بود خیلی از سایت شما لذت بردم من یکی از طرفداران سایت شما هستم ممنون میشم اگر یک دکمه refresh را به هم صورت یاد دهید من که خیلی استفاده کردم
درود توصیه میکنم از <a href="https://jsfiddle.net/vito_comp/d7r1erua/" target="_blank" rel="noopener nofollow ugc">این کد</a> استفاده کنید و بجای آیکون ریلود از رفرش استفاده کنید. همه مفاهیم کدش رو هم تو مقاله در بخش دکمههای آیکون دار توضیح دادیم. ممنون که با ما همراه هستید :)
با سلام ادب و احترام دوست خوبم ممنون میشم اگه توی 2 مورد بهم کمک کنید 1- لینکی توی قسمت استایل دکمههای شبکههای اجتماعی خط اول استخراج شده که مثل اینکه لینک منقضی شده 2-در پیجی هم قصد استفاده از فونتهای awesome رو دارم اما هیچی واسم ظاهر نمیشه !!! دلیل خاصی میتونه داشته باشه ؟ با تشکر بسیار زیاد از زمانی که صرف میکنید
درود. 1. حق با شماست من کدهامو از کدپن مستقیما کپی کرده بودم و با حذف اخیر دایرکتوریش دیگه لینک فعال نیست. این بخش از مقاله رو بازنویسی کردم و الان میتونید بدون هیچ مشکلی ازش استفاده کنید. اون خط اول استایل حذف شد و به جاش در خط اول html آیکون شبکههای اجتماعی با کمک fontawsome ایمپورت شد. 2. این مشکل که میفرمایید، روی عبارات هست یا آیکون رو هم نمیتونید ببینید؟
سلام خیلی عالی بود ، تشکر میکنم ، ولی ای کاش میشد اینها را یاد بدید در قالب ویدیو ، میدونید من کلا یکم از کپی پیست کردن چیزی که بلد نیستم بسازمش ، خوشم نمیاد
درود. حقیقتا برای درک دقیق این دکمهها شما باید با HTML ، CSS و جاوا اسکریپت آشنا باشید و آموزش این دو مبحث در قالب یک ویدیو نمیگنجه. برای همین در بخش مقدمه توصیه کردیم حتما این مباحث رو مرور کنید. به جز این در مسائلی مثل هاور، با متن سعی کردیم توضیحات تکمیلی رو بگیم. با این حال بررسی میکنیم که اگر شد آموزش ویدیویی رو هم در دستور کار قرار بدیم. ممنون که با ما همراه هستید.
باید کد هارو پست سر هم بزنیم یا جدا جدا منظورم اینه که اولhtml رو بزنیم و دوم css و سومjava script؟
درود. ترتیبشون فرقی نداره. شما یه فایل با پسوند html ایجاد میکنید و کدهای html رو در تگ html، کدهای css رو در تگ style و کدهای جاوا اسکریپت رو در تگ script میگذارید.
سلام. خوشحالیم که مقاله براتون مفید بوده :)
درود. ممنون از همراهی شما. خوشحالیم که این مقاله براتون مفید بوده:)
سلام واقعا کدهاتون عالی بود من تا حالا تو هیچ سایتی نظر نداده بودم ولی این کدها واقعا عالی بود دلم نیومد تشکر نکنم خیلی ممنون (:
سلام. خوشحالیم که مقاله براتون مفید بوده :)
سلام. خوشحالیم که این مقاله براتون مفید بوده.
دوره الفبای برنامه نویسی با هدف انتخاب زبان برنامه نویسی مناسب برای شما و پاسخگویی به سوالات متداول در شروع یادگیری موقتا رایگان شد:


